

Where to start in RankAI
In your RankAI project, open Settings in the sidebar. Under Site Integration, find Connected CMS and click Configure.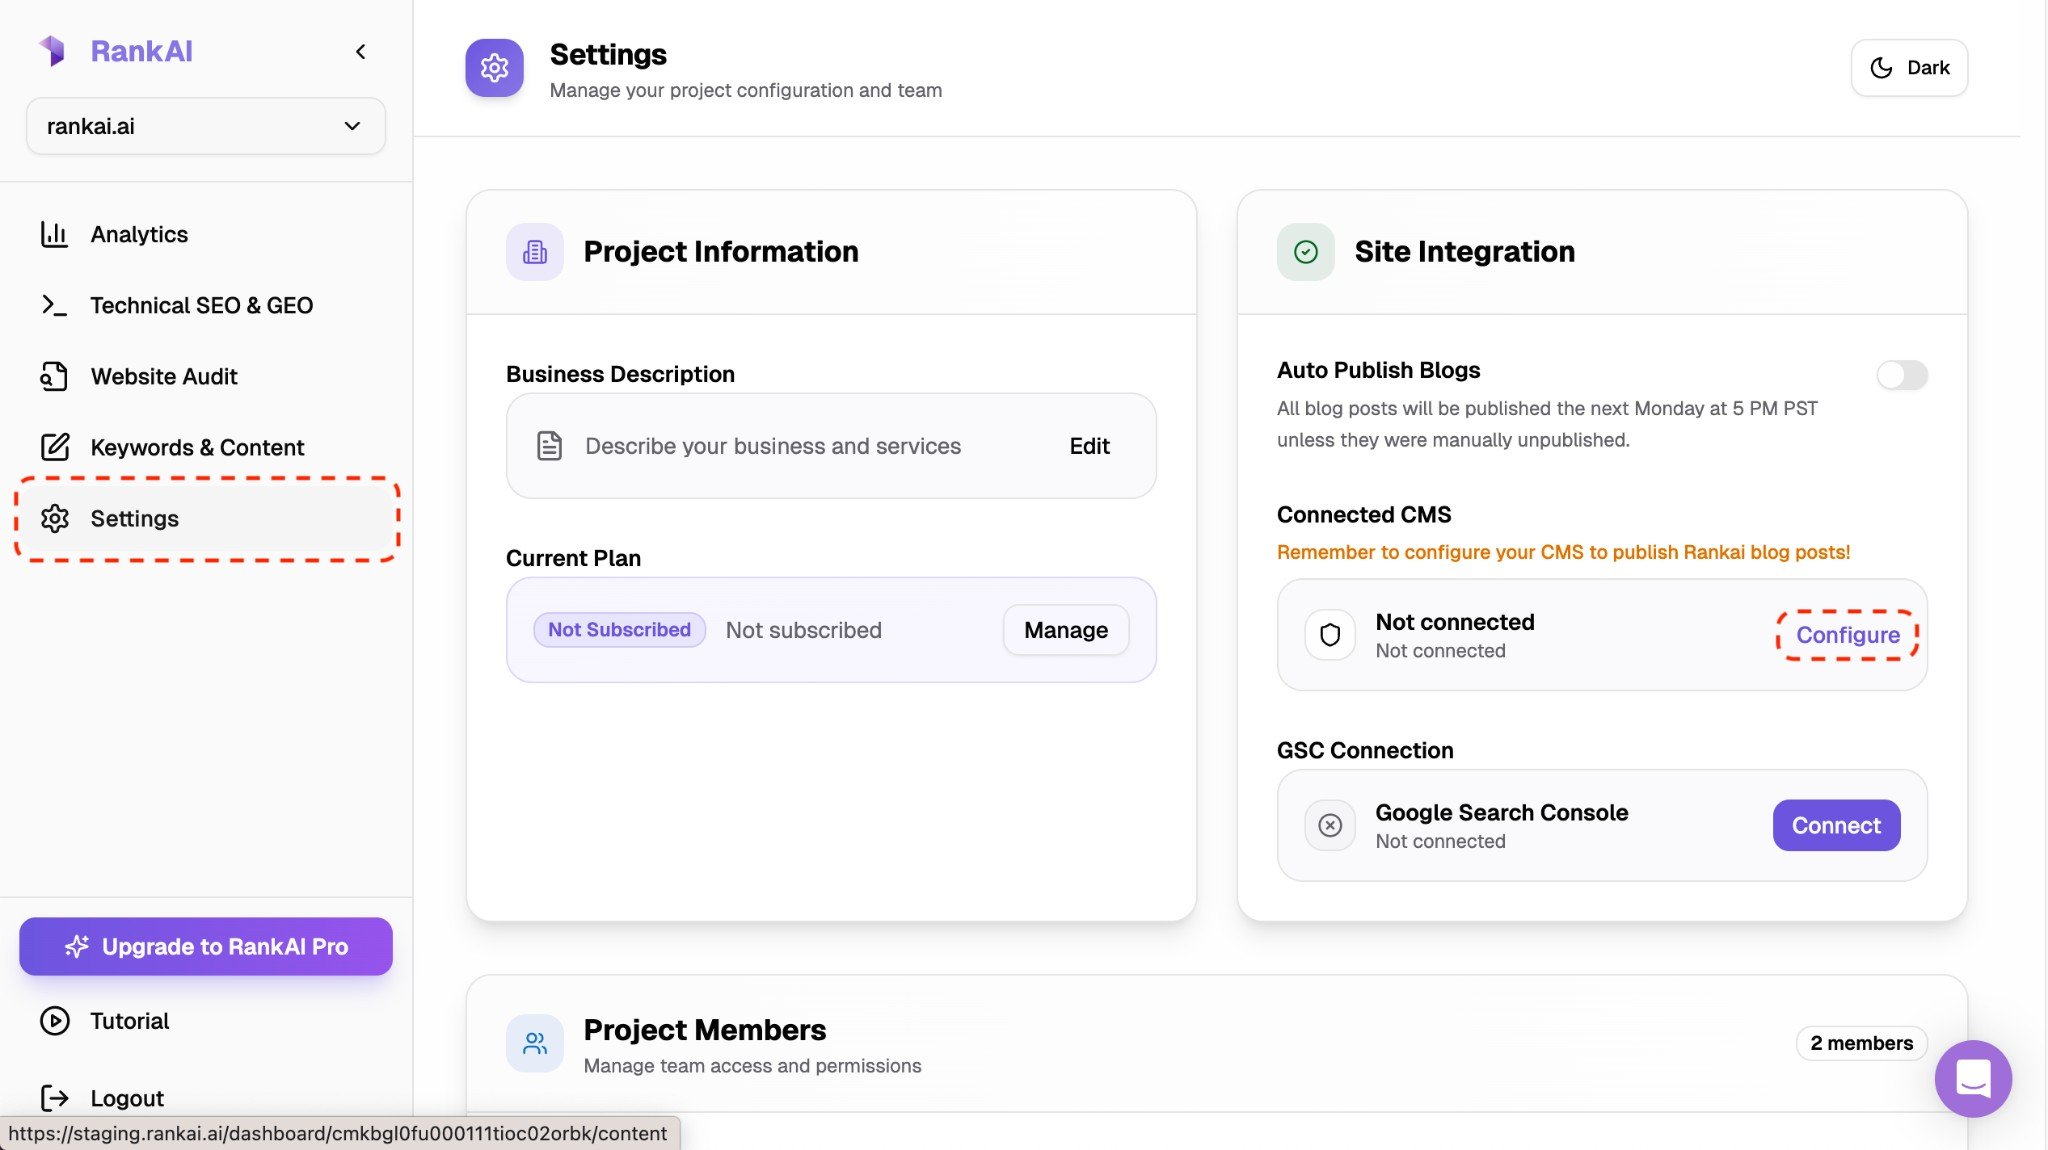
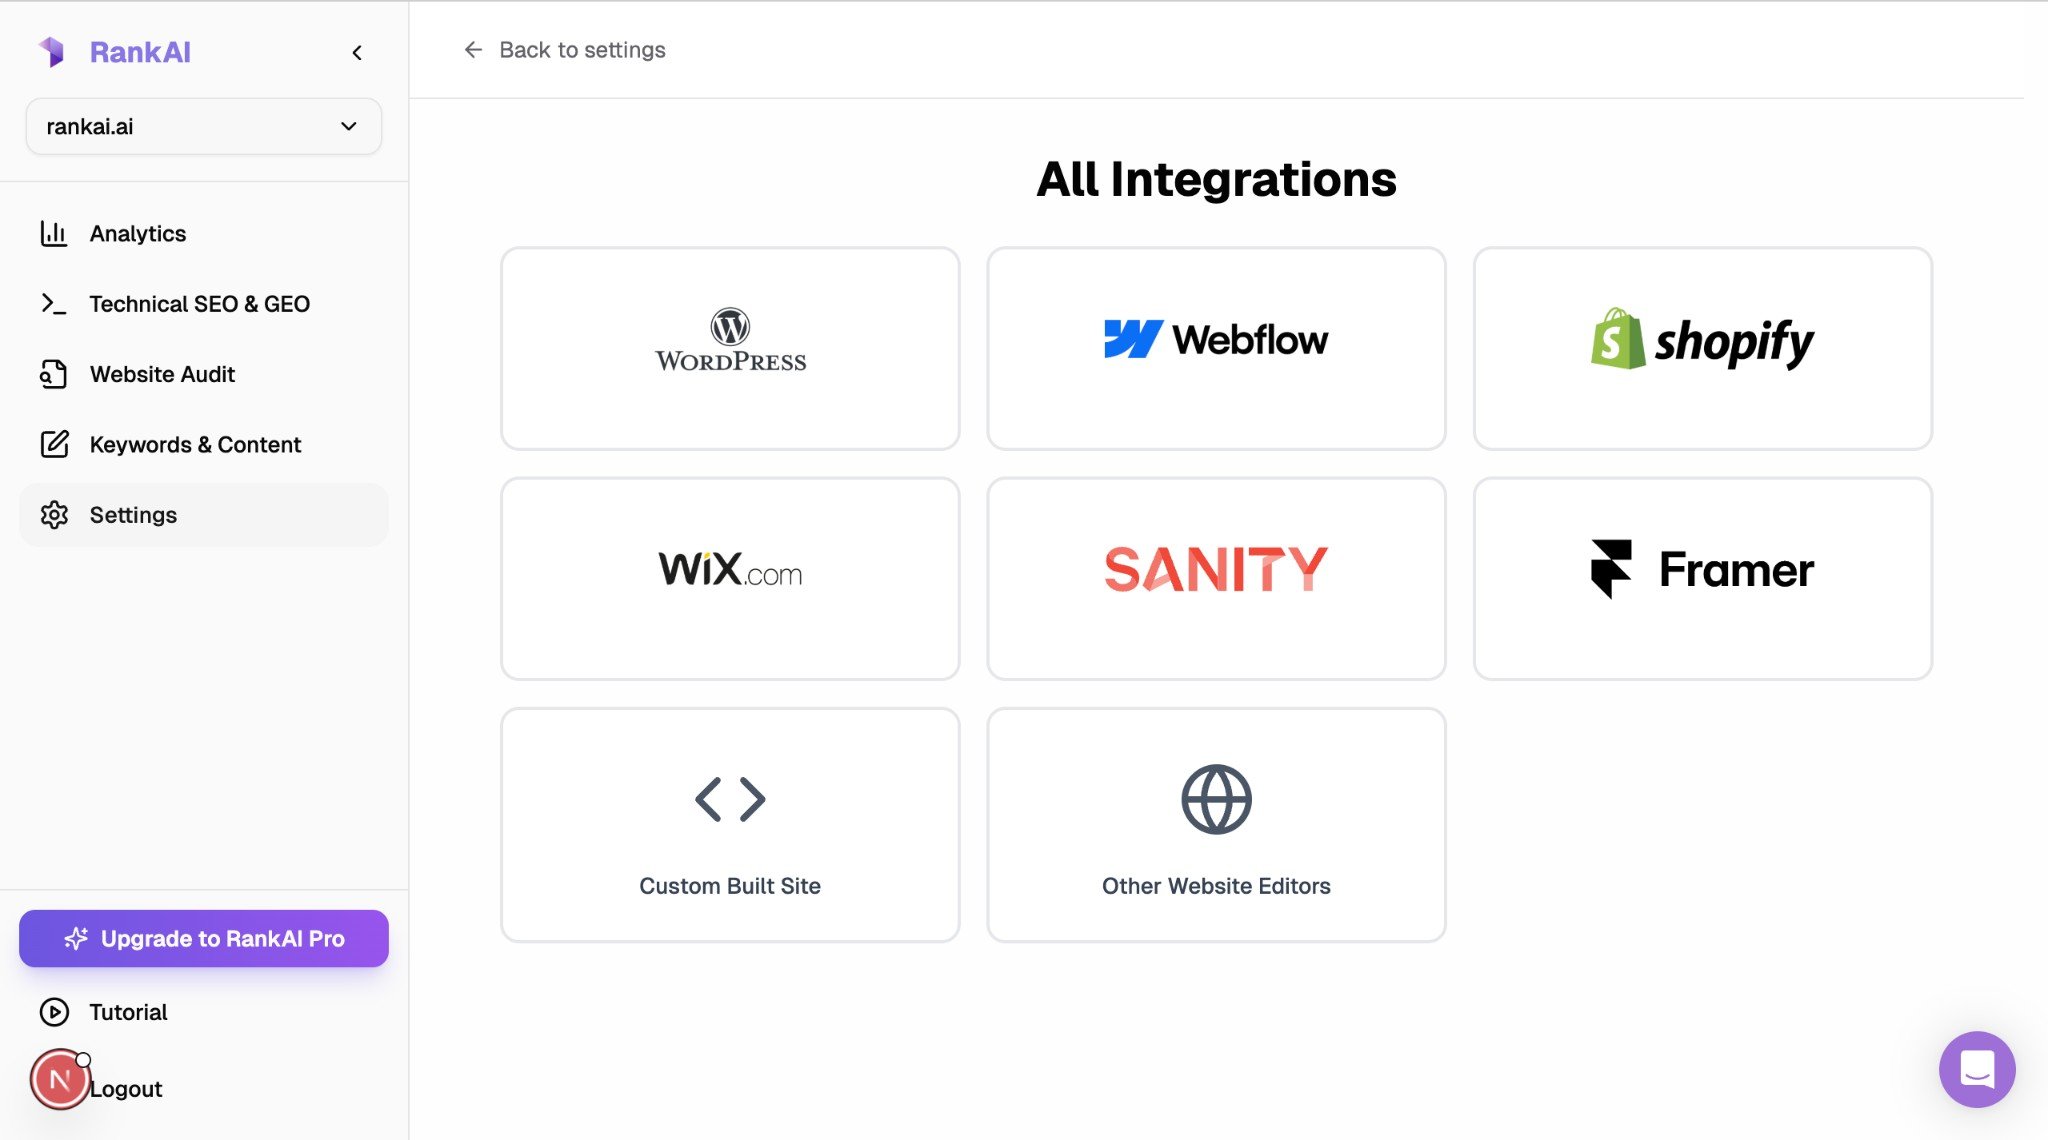
Step 1: Access Project Settings
Open your Webflow dashboard and select the project (site) that has your blog. Hover over the site card and click the Settings icon (gear) to open Project Settings.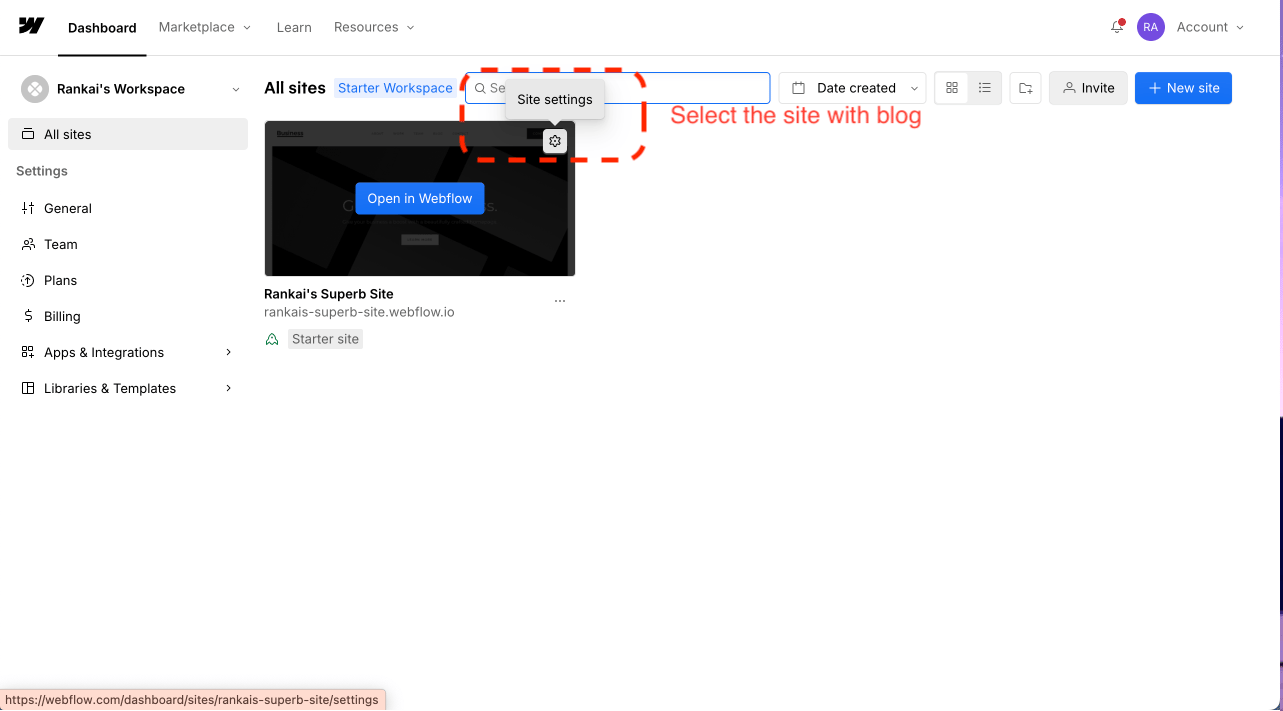
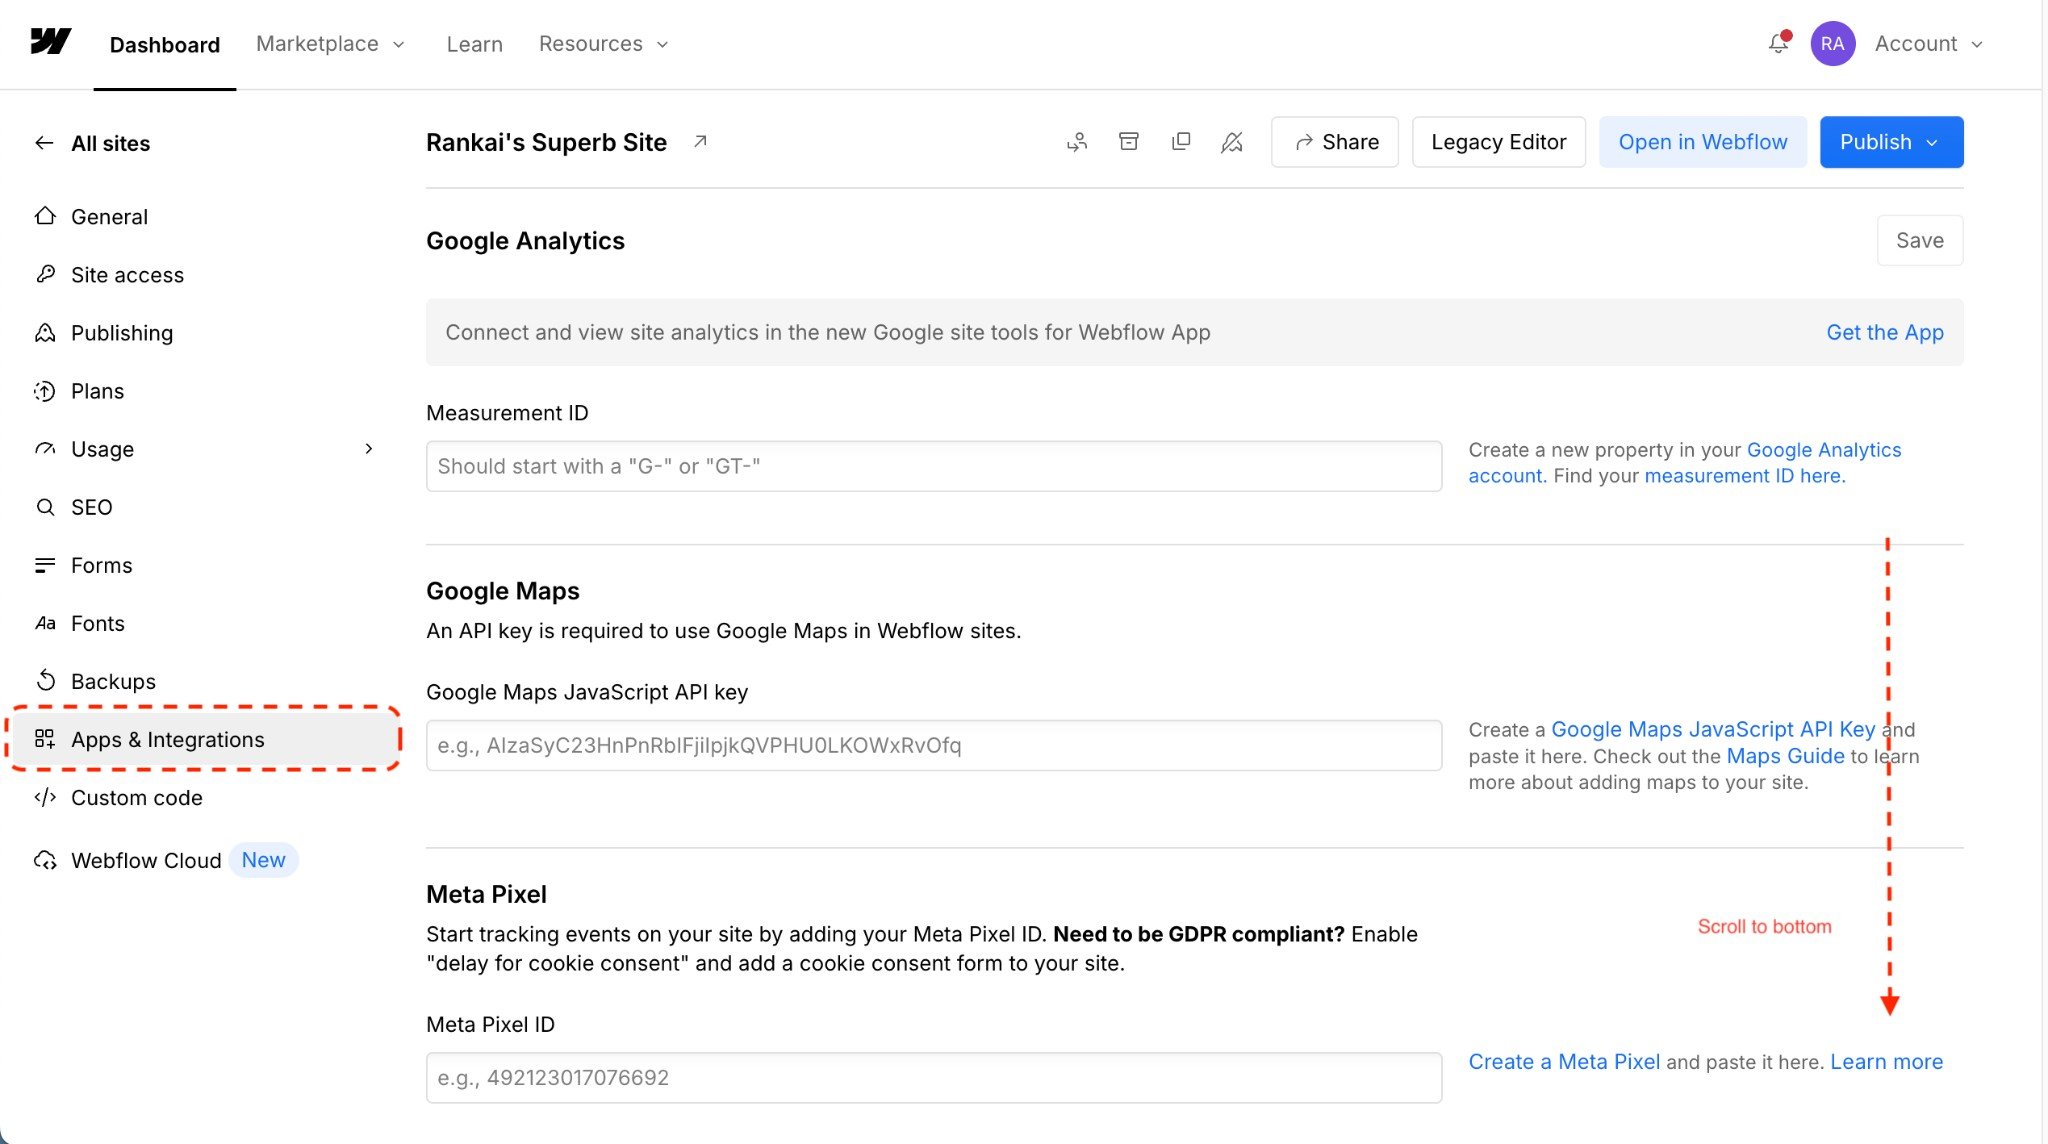
Step 2: Generate API Token
In the API access section, click Generate API token to create a new token for RankAI.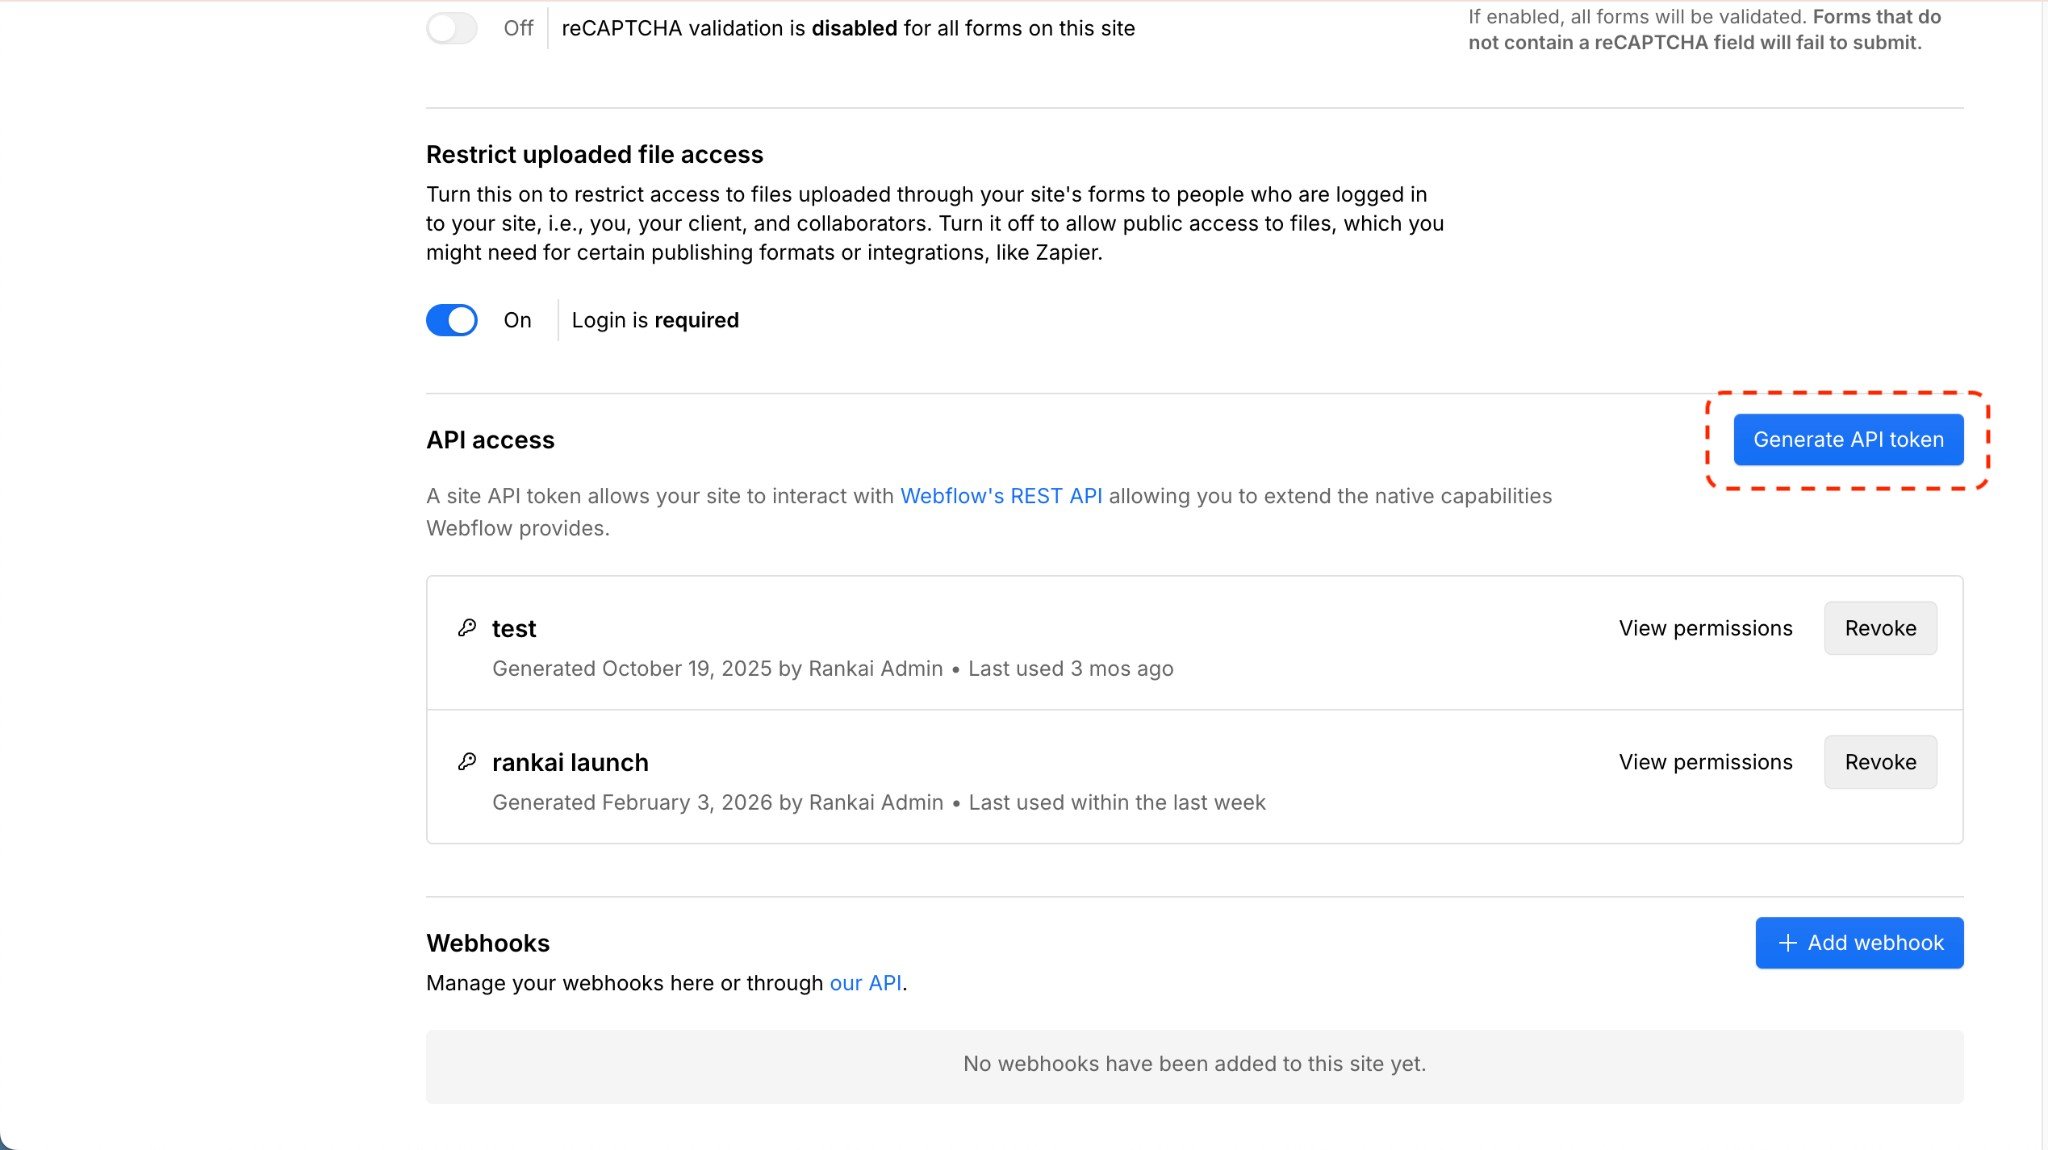
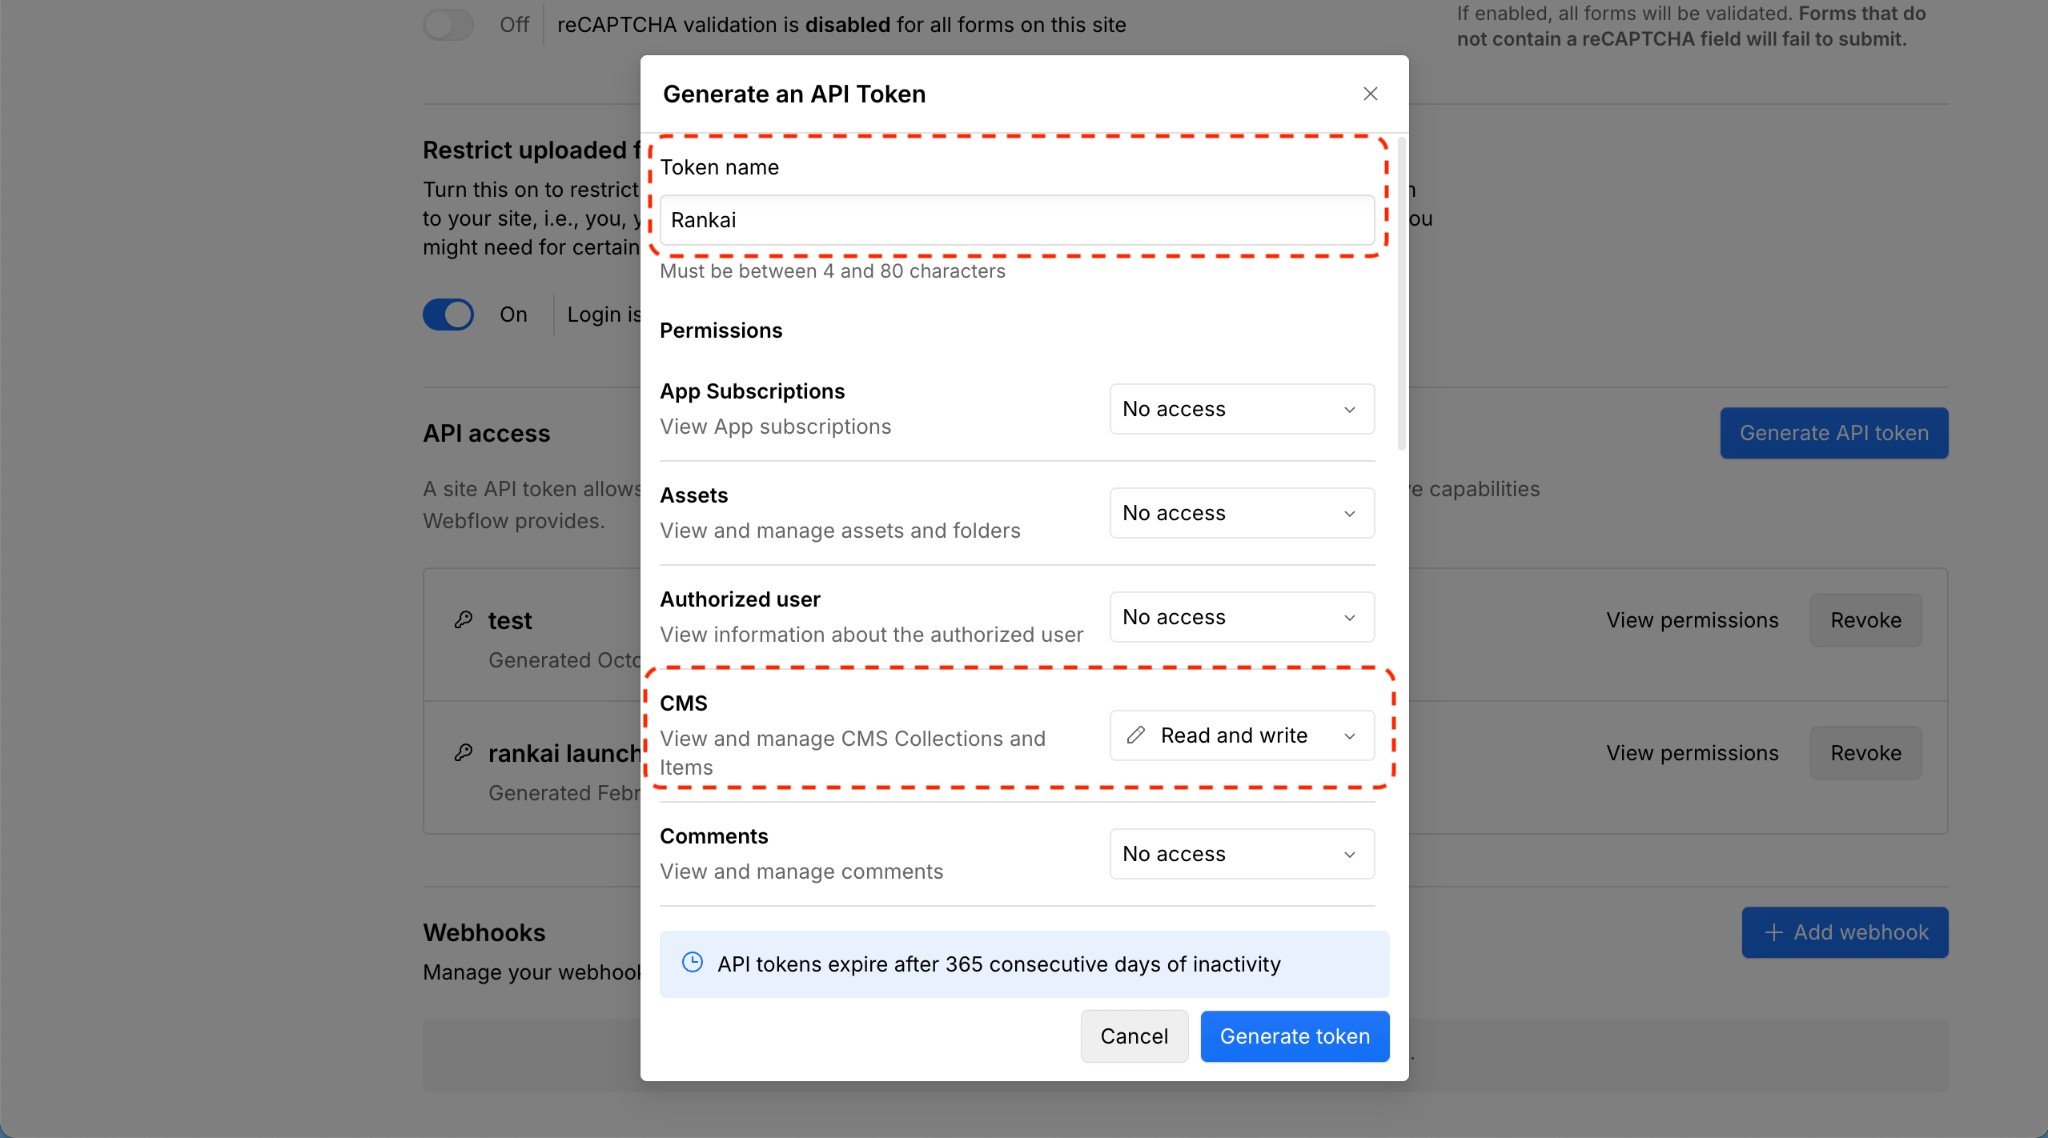
- CMS: Read and write (required for publishing blog posts)
- Pages: Read-only (optional)
- Site: Read-only (optional)
Step 3: Connect Token
Back in your RankAI project, open the Webflow integration screen. Paste your API Site Token in the field and click Connect to complete the connection. Connect Token Paste your API token below to complete the connection. API Site Token: Paste the generated site token. After connecting, RankAI will verify the token and load your Webflow site’s CMS collections. You’ll then configure the collection and field mappings in Step 4.Step 4: Configure Collection and Field Mappings
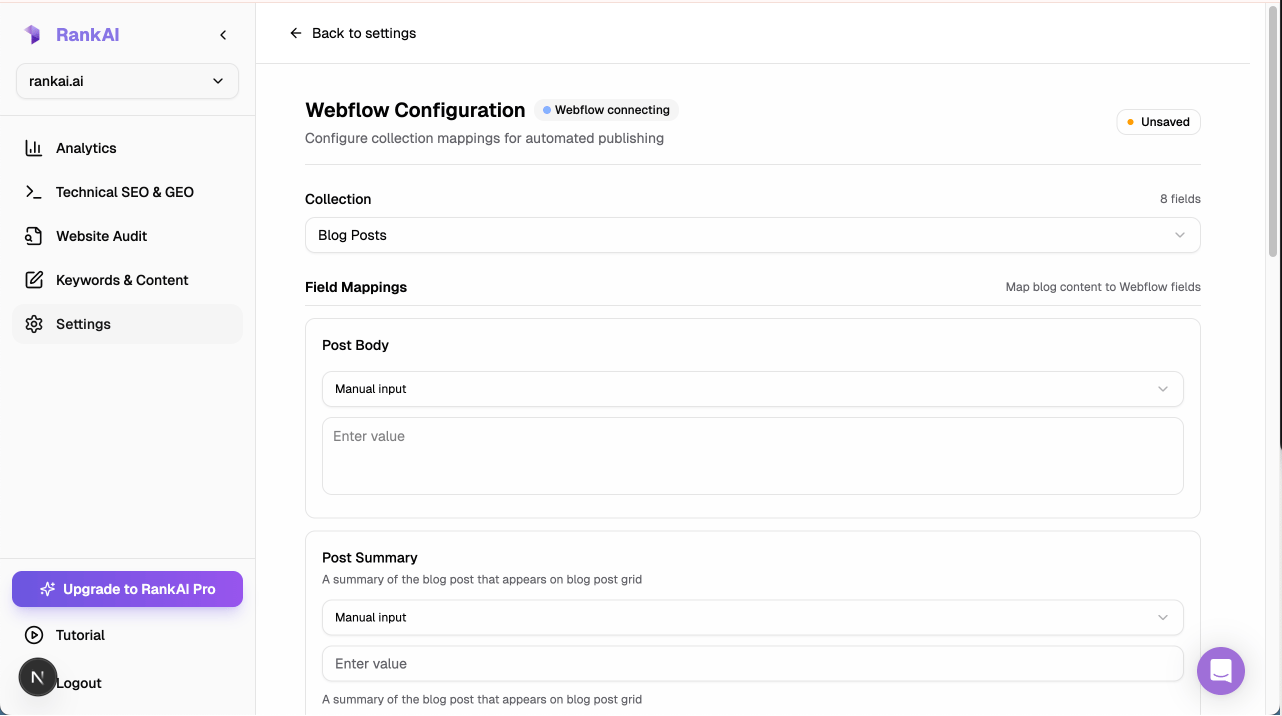
Once connected, you’ll see the Webflow Configuration screen. Here you’ll select which CMS collection to publish to and map RankAI fields to your Webflow fields.4.1 Select Collection
Use the Collection dropdown to select the CMS collection where blog posts will be published (e.g., “Blog Posts”). The number of fields in the collection is shown on the right.4.2 Map Fields
Under Field Mappings, map each Webflow field to the corresponding RankAI content. For each field, you can select from the following options:- Manual input: Enter a custom value manually
- Title: The blog post title
- Description: The meta description / summary
- Body: The full blog post content (HTML)
- Feature Image: The main image for the post
- URL Slug: The URL-friendly slug for the post
- Current Time: The current timestamp when publishing
- Post Body → Body
- Post Summary → Description
- Main Image → Feature Image
- Slug → URL Slug
4.3 Save Configuration
After mapping all fields, click Save Configuration to save your settings. The status indicator in the top right will change from Unsaved to Saved when successful. Your Webflow integration is now ready for publishing.FAQ
What if the connection fails?
Double-check that (1) you’re using the full API token copied from Webflow, (2) the token has CMS: Read and write permission enabled, and (3) the token hasn’t been revoked in your Webflow project settings.Where can I find or regenerate my API token?
Go to your Webflow project’s Settings → Apps & Integrations → API access. You can view existing tokens and their permissions, or generate a new token. If you regenerate, paste the new token into RankAI and reconnect.What CMS collection should I use?
Select the collection where you want blog posts published. This is typically named “Blog Posts”, “Articles”, or similar. The collection should have fields for title, content, and slug at minimum.Where can I get more support?
Contact your RankAI account team or check the help section in your dashboard.Install the technical SEO & AEO script
The CMS connection above handles articles. Follow the separate illustrated technical SEO & AEO setup to install the RankAI script.Last reviewed: October 12, 2026.