> ## Documentation Index
> Fetch the complete documentation index at: https://docs.rankai.ai/llms.txt
> Use this file to discover all available pages before exploring further.
# Sanity blog integration guide
> Sanity blog integration guide. Follow the original illustrated setup steps.
This guide walks you through connecting your Sanity project to RankAI so we can publish and manage your SEO and AEO content. You will need access to your Sanity project settings and your RankAI dashboard.
## Where to start in RankAI
In your RankAI project, open **Settings** in the sidebar. Under **Site Integration**, find **Connected CMS** and click **Configure**. On the next screen, select **Sanity** to continue.
## Step 1: Get your Sanity project ID
Open your Sanity Dashboard and go to **Organization Settings** using **Manage** (top-left). Select the project you want to connect, then copy the **Project ID** shown near the top of the page.
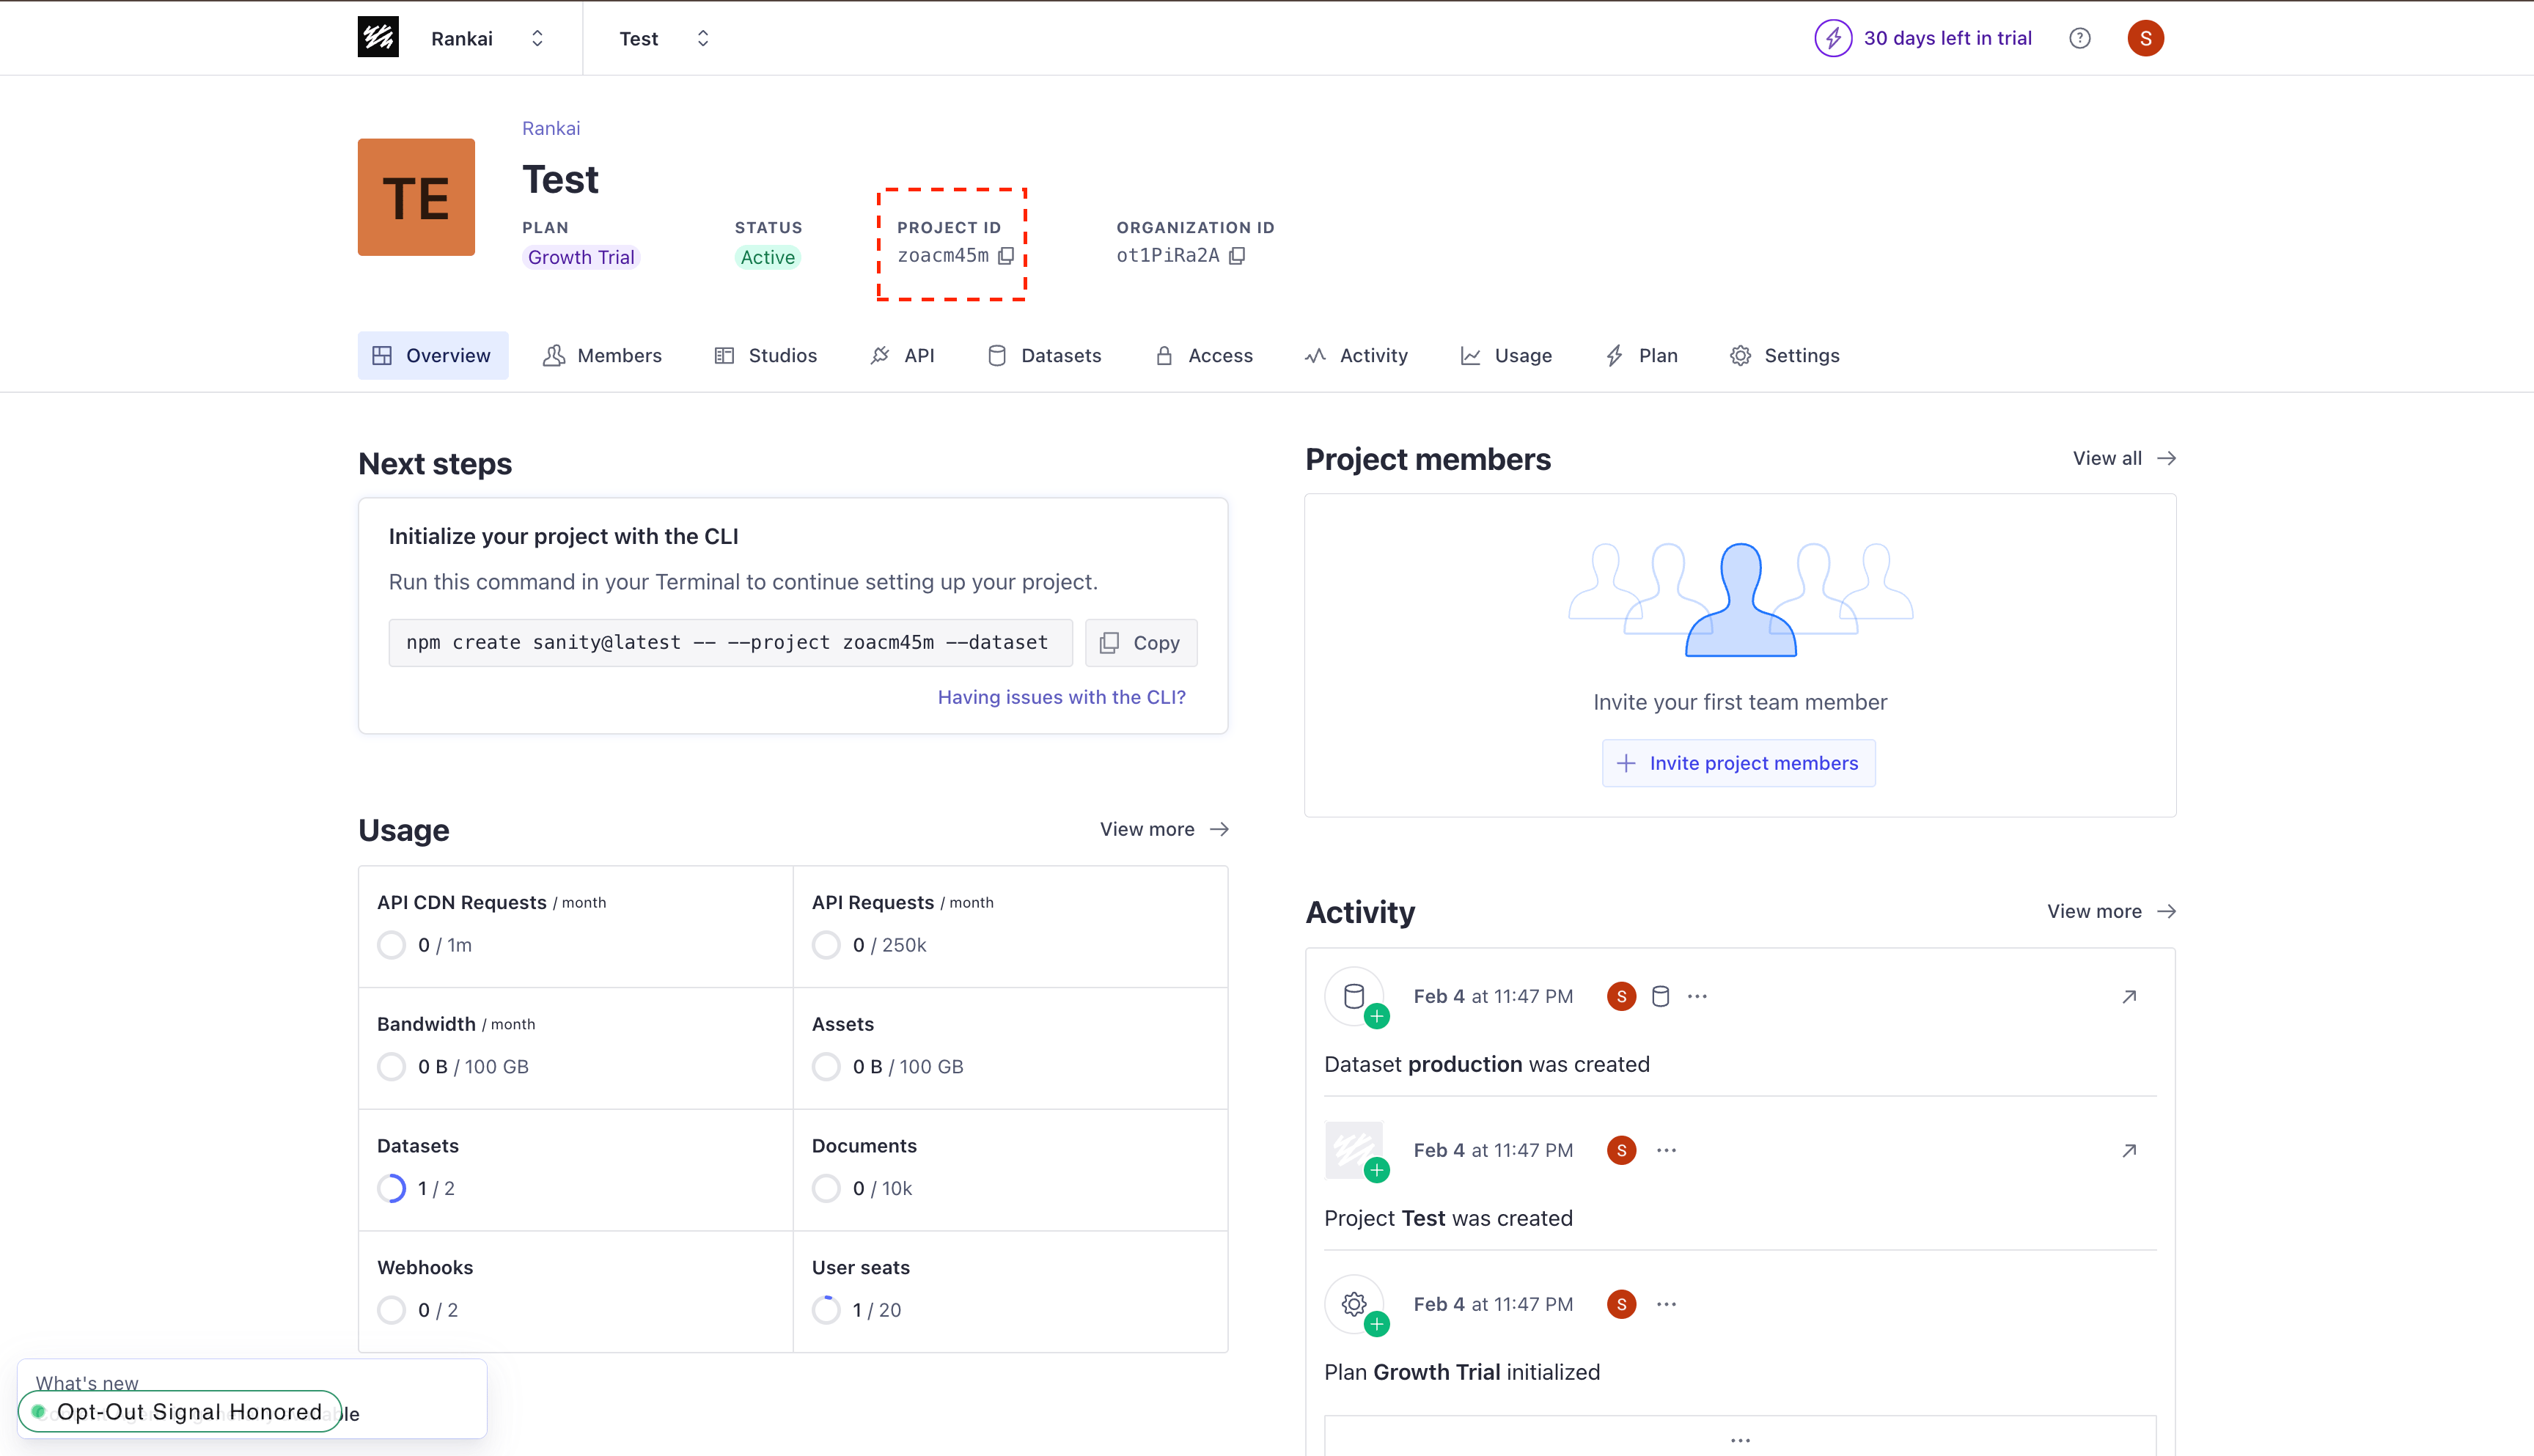 *Copy the Project ID from the top of the Sanity project overview.*
Paste the project ID into the **Sanity Project ID** field in RankAI.
## Step 2: Find your dataset name
In the same Sanity project, open the **Datasets** tab and copy the dataset name you want RankAI to publish to (for example, `production`).
*Copy the Project ID from the top of the Sanity project overview.*
Paste the project ID into the **Sanity Project ID** field in RankAI.
## Step 2: Find your dataset name
In the same Sanity project, open the **Datasets** tab and copy the dataset name you want RankAI to publish to (for example, `production`).
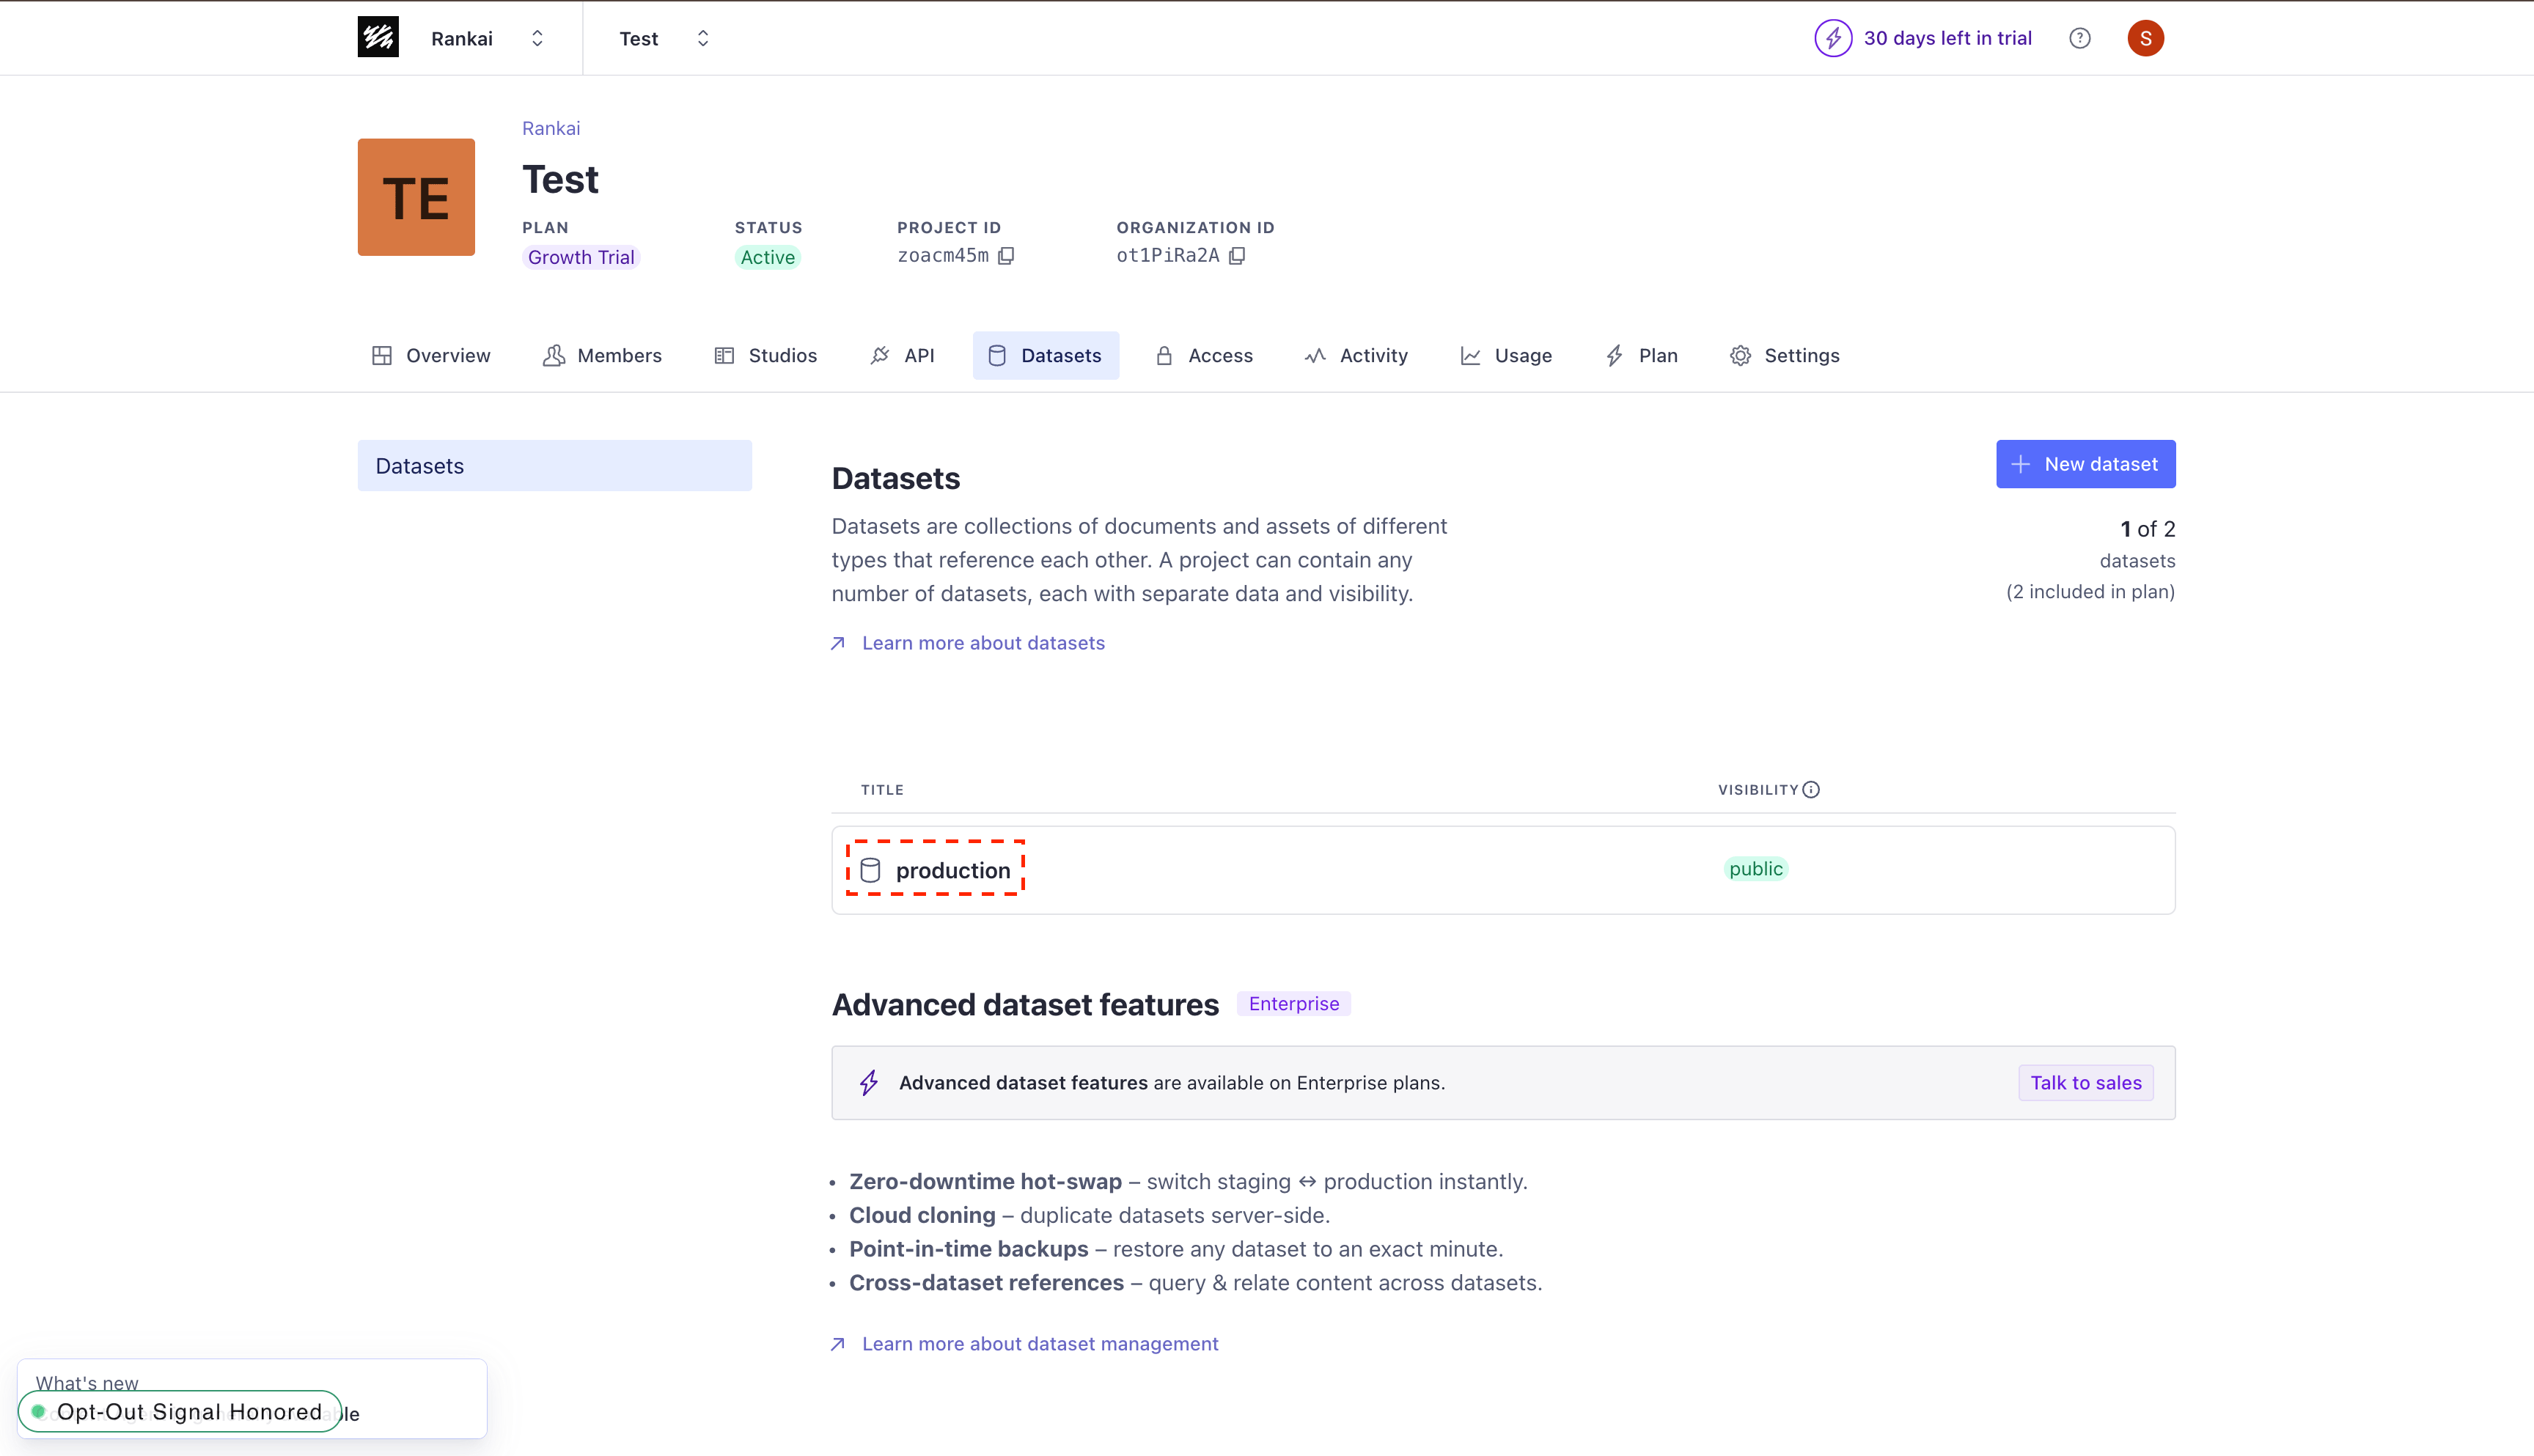 *Copy the dataset name from the Datasets tab.*
Paste the dataset name into the **Sanity Dataset Name** field in RankAI.
## Step 3: Create an API token and add a CORS origin
RankAI needs an API token with write access and an approved CORS origin for publishing. Follow the steps below in your Sanity project settings.
* Go to **API** > **Tokens** > **Add API token**. Give it a name, set the permission to **Developer** or **Editor**, then copy the token.
*Copy the dataset name from the Datasets tab.*
Paste the dataset name into the **Sanity Dataset Name** field in RankAI.
## Step 3: Create an API token and add a CORS origin
RankAI needs an API token with write access and an approved CORS origin for publishing. Follow the steps below in your Sanity project settings.
* Go to **API** > **Tokens** > **Add API token**. Give it a name, set the permission to **Developer** or **Editor**, then copy the token.
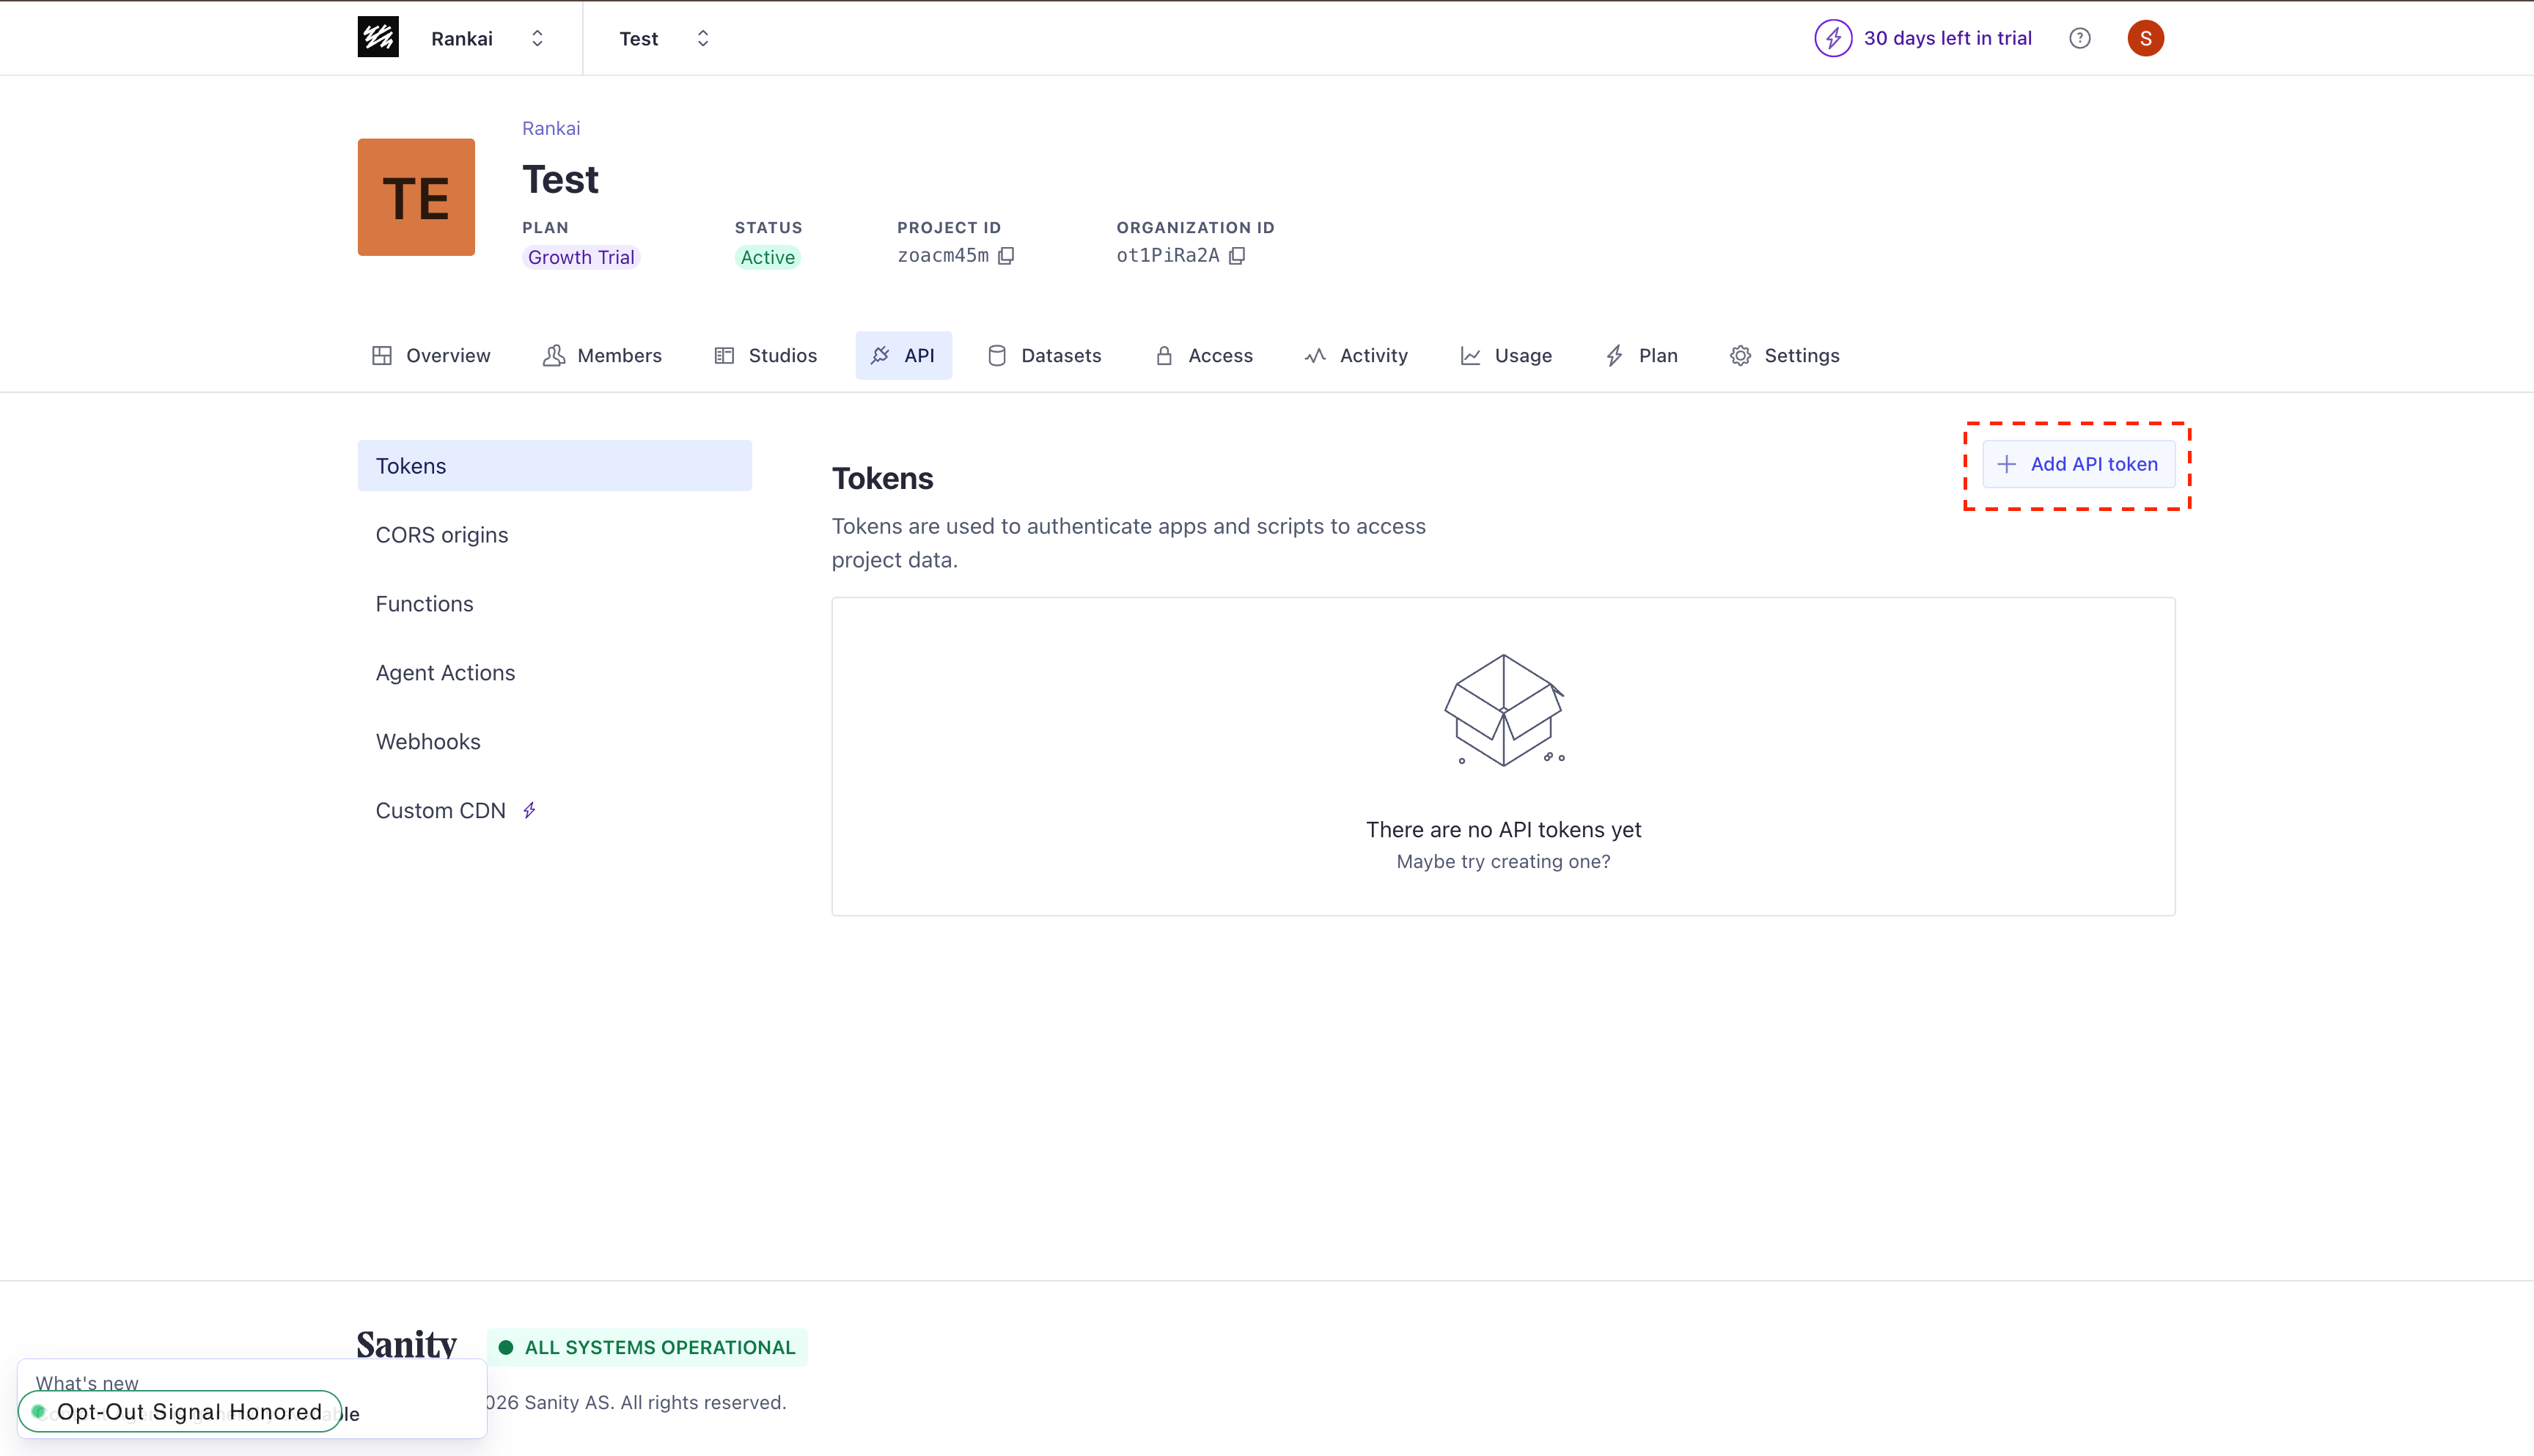 *Add a new API token in the Sanity API settings.*
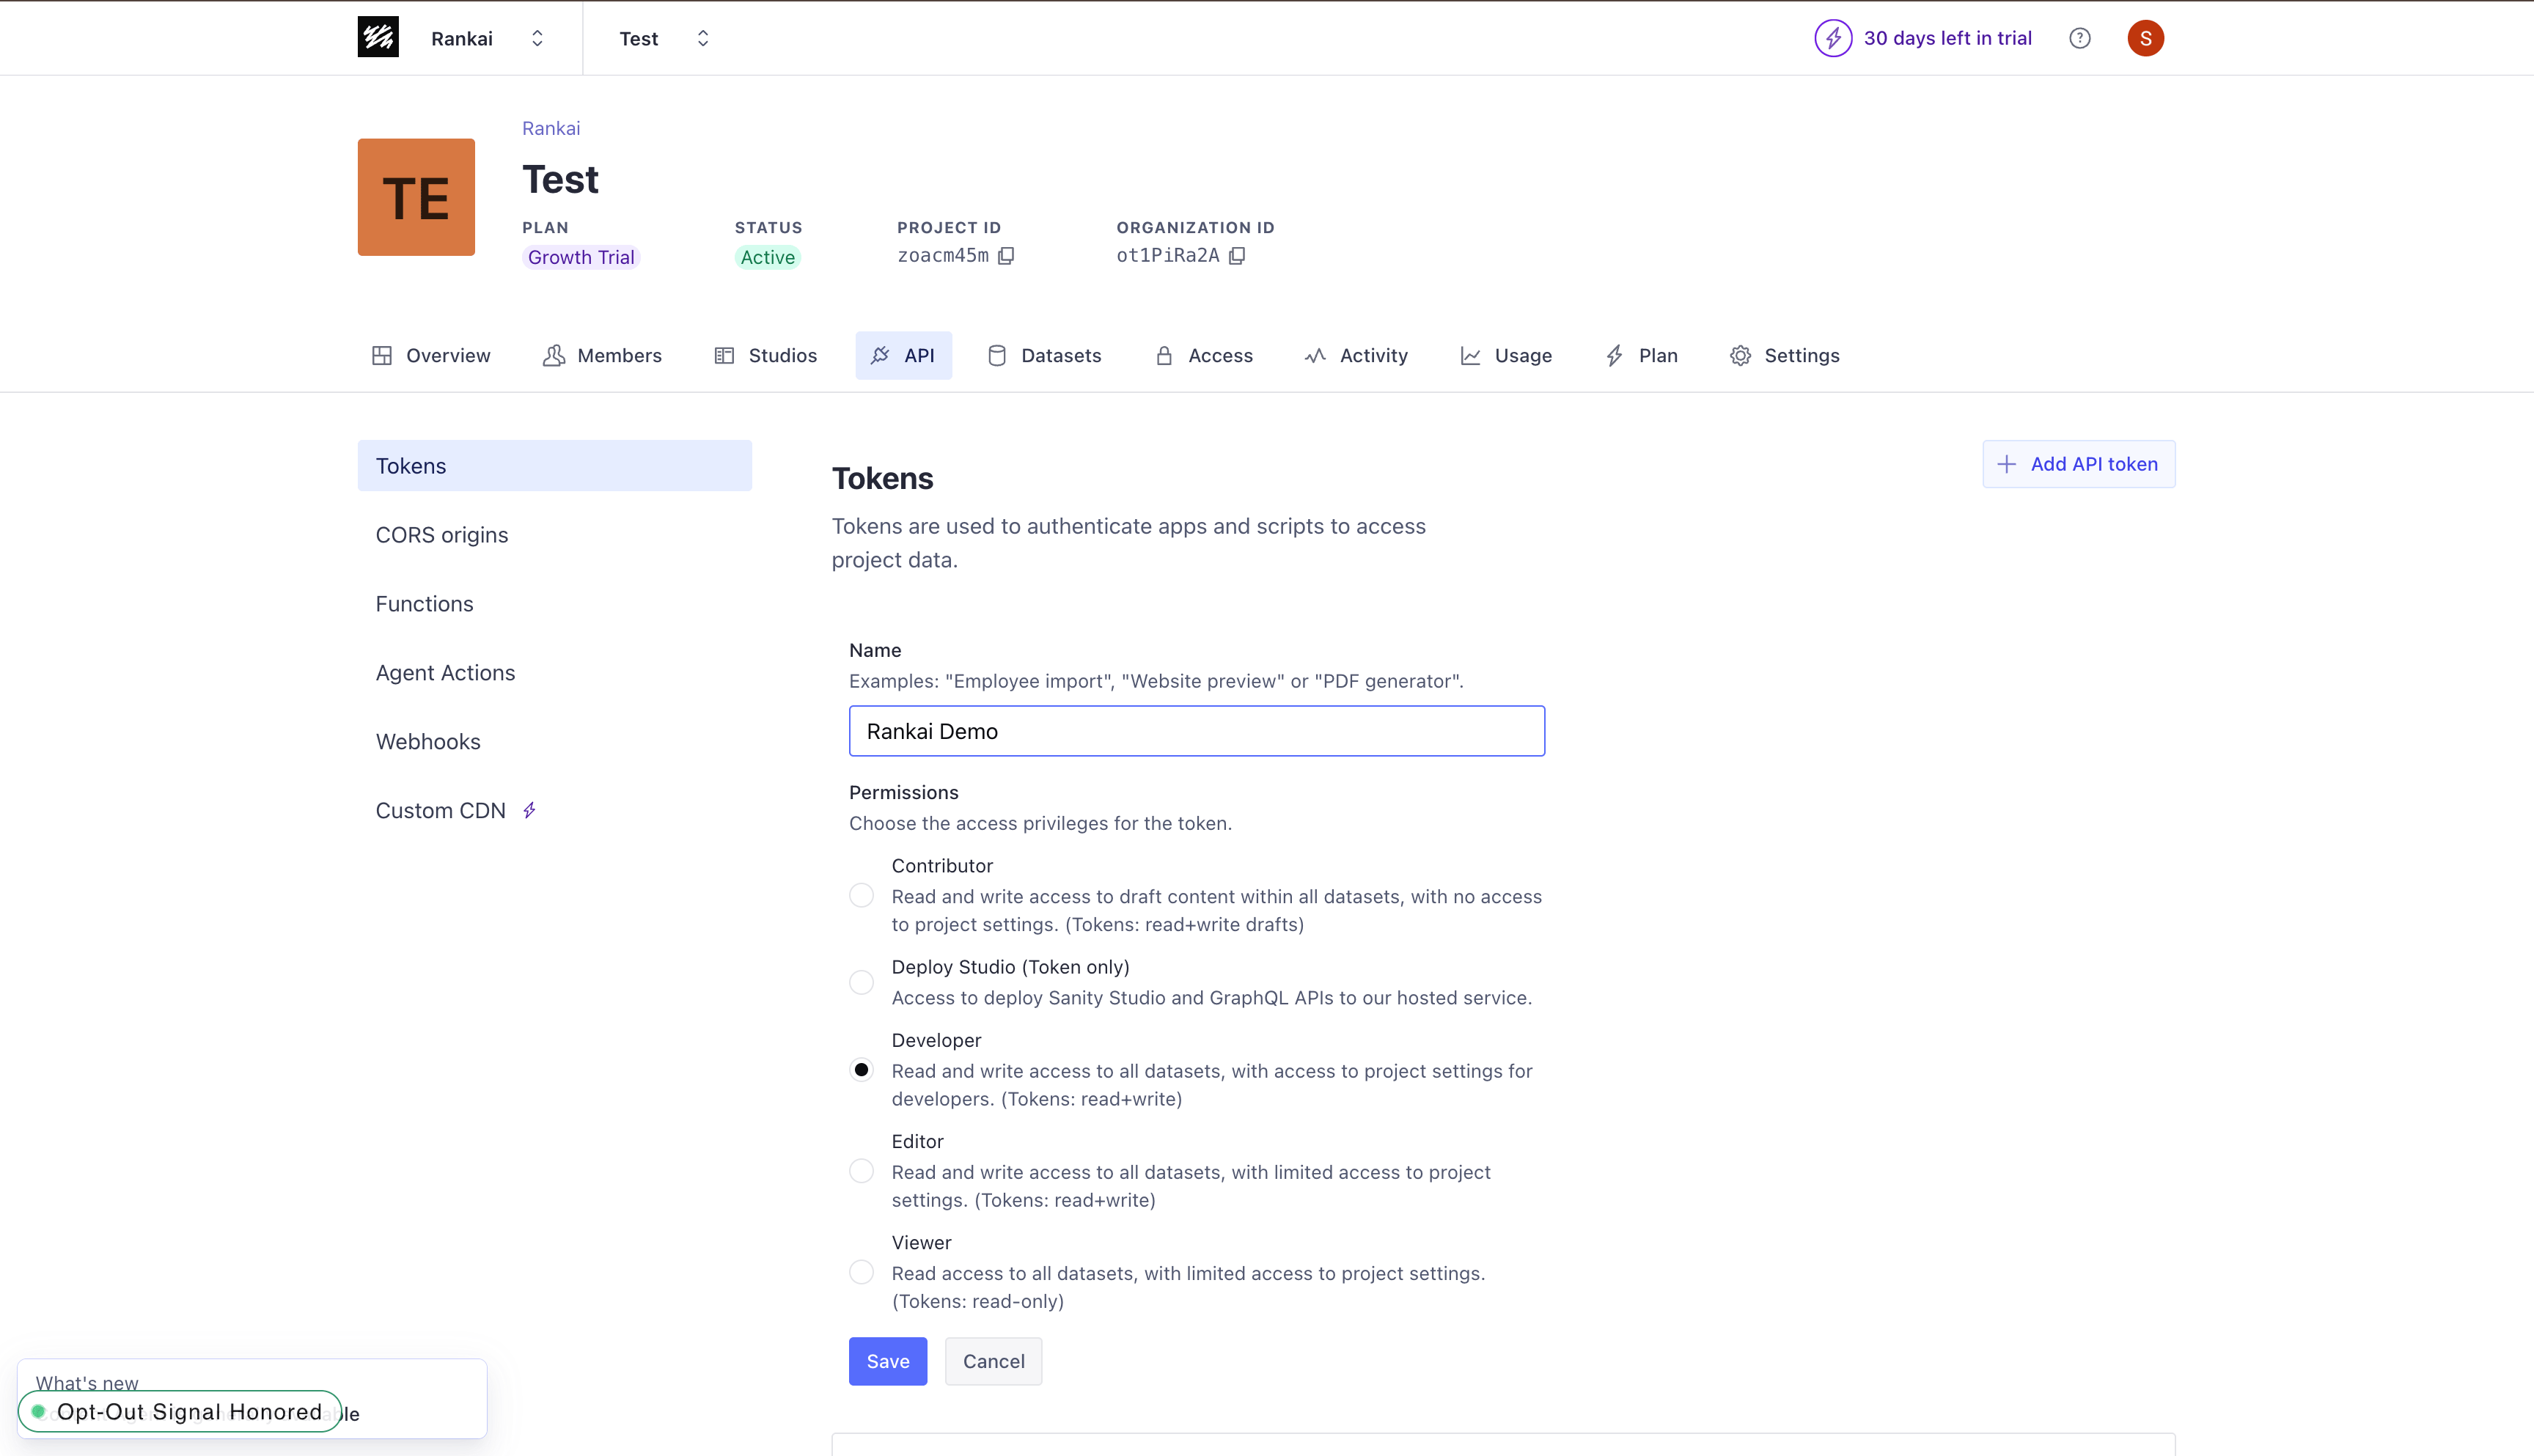 *Configure the token name and select Developer or Editor permissions.*
* In **API** > **CORS origins**, click **Add CORS origin** and add your RankAI app URL (for example, `https://rankai.ai`). Save your changes.
*Configure the token name and select Developer or Editor permissions.*
* In **API** > **CORS origins**, click **Add CORS origin** and add your RankAI app URL (for example, `https://rankai.ai`). Save your changes.
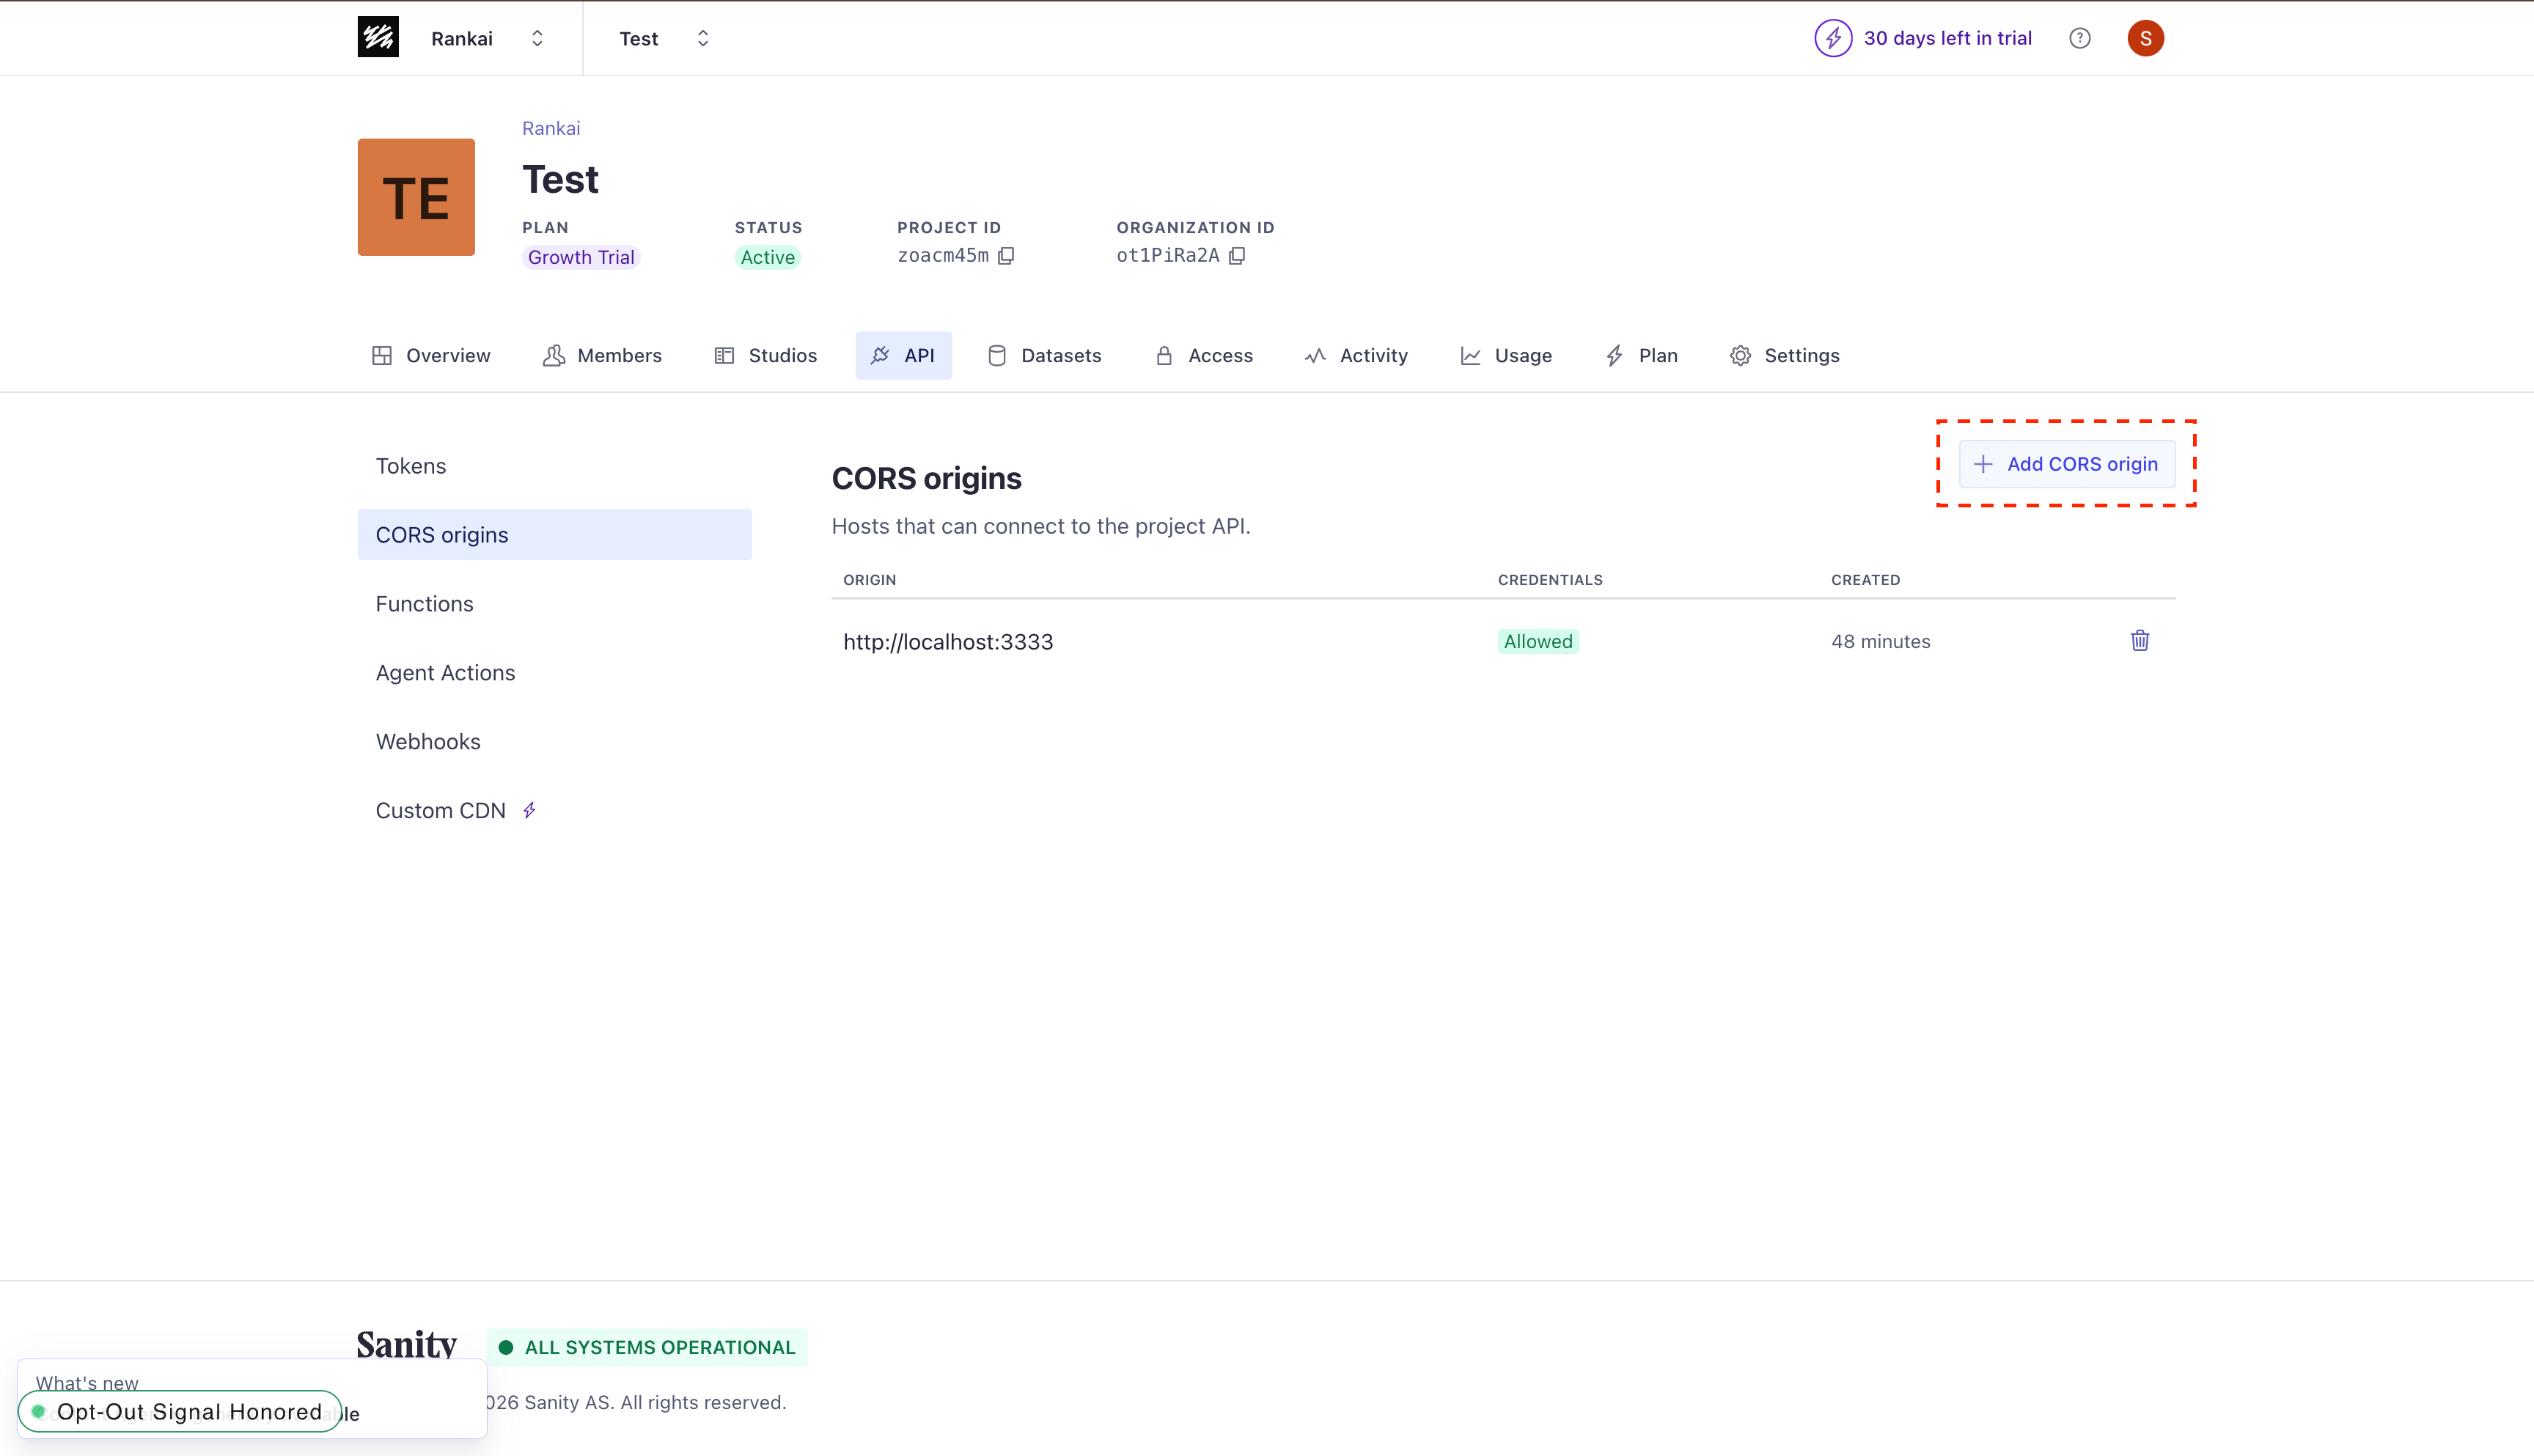 *Add a new CORS origin from the API settings.*
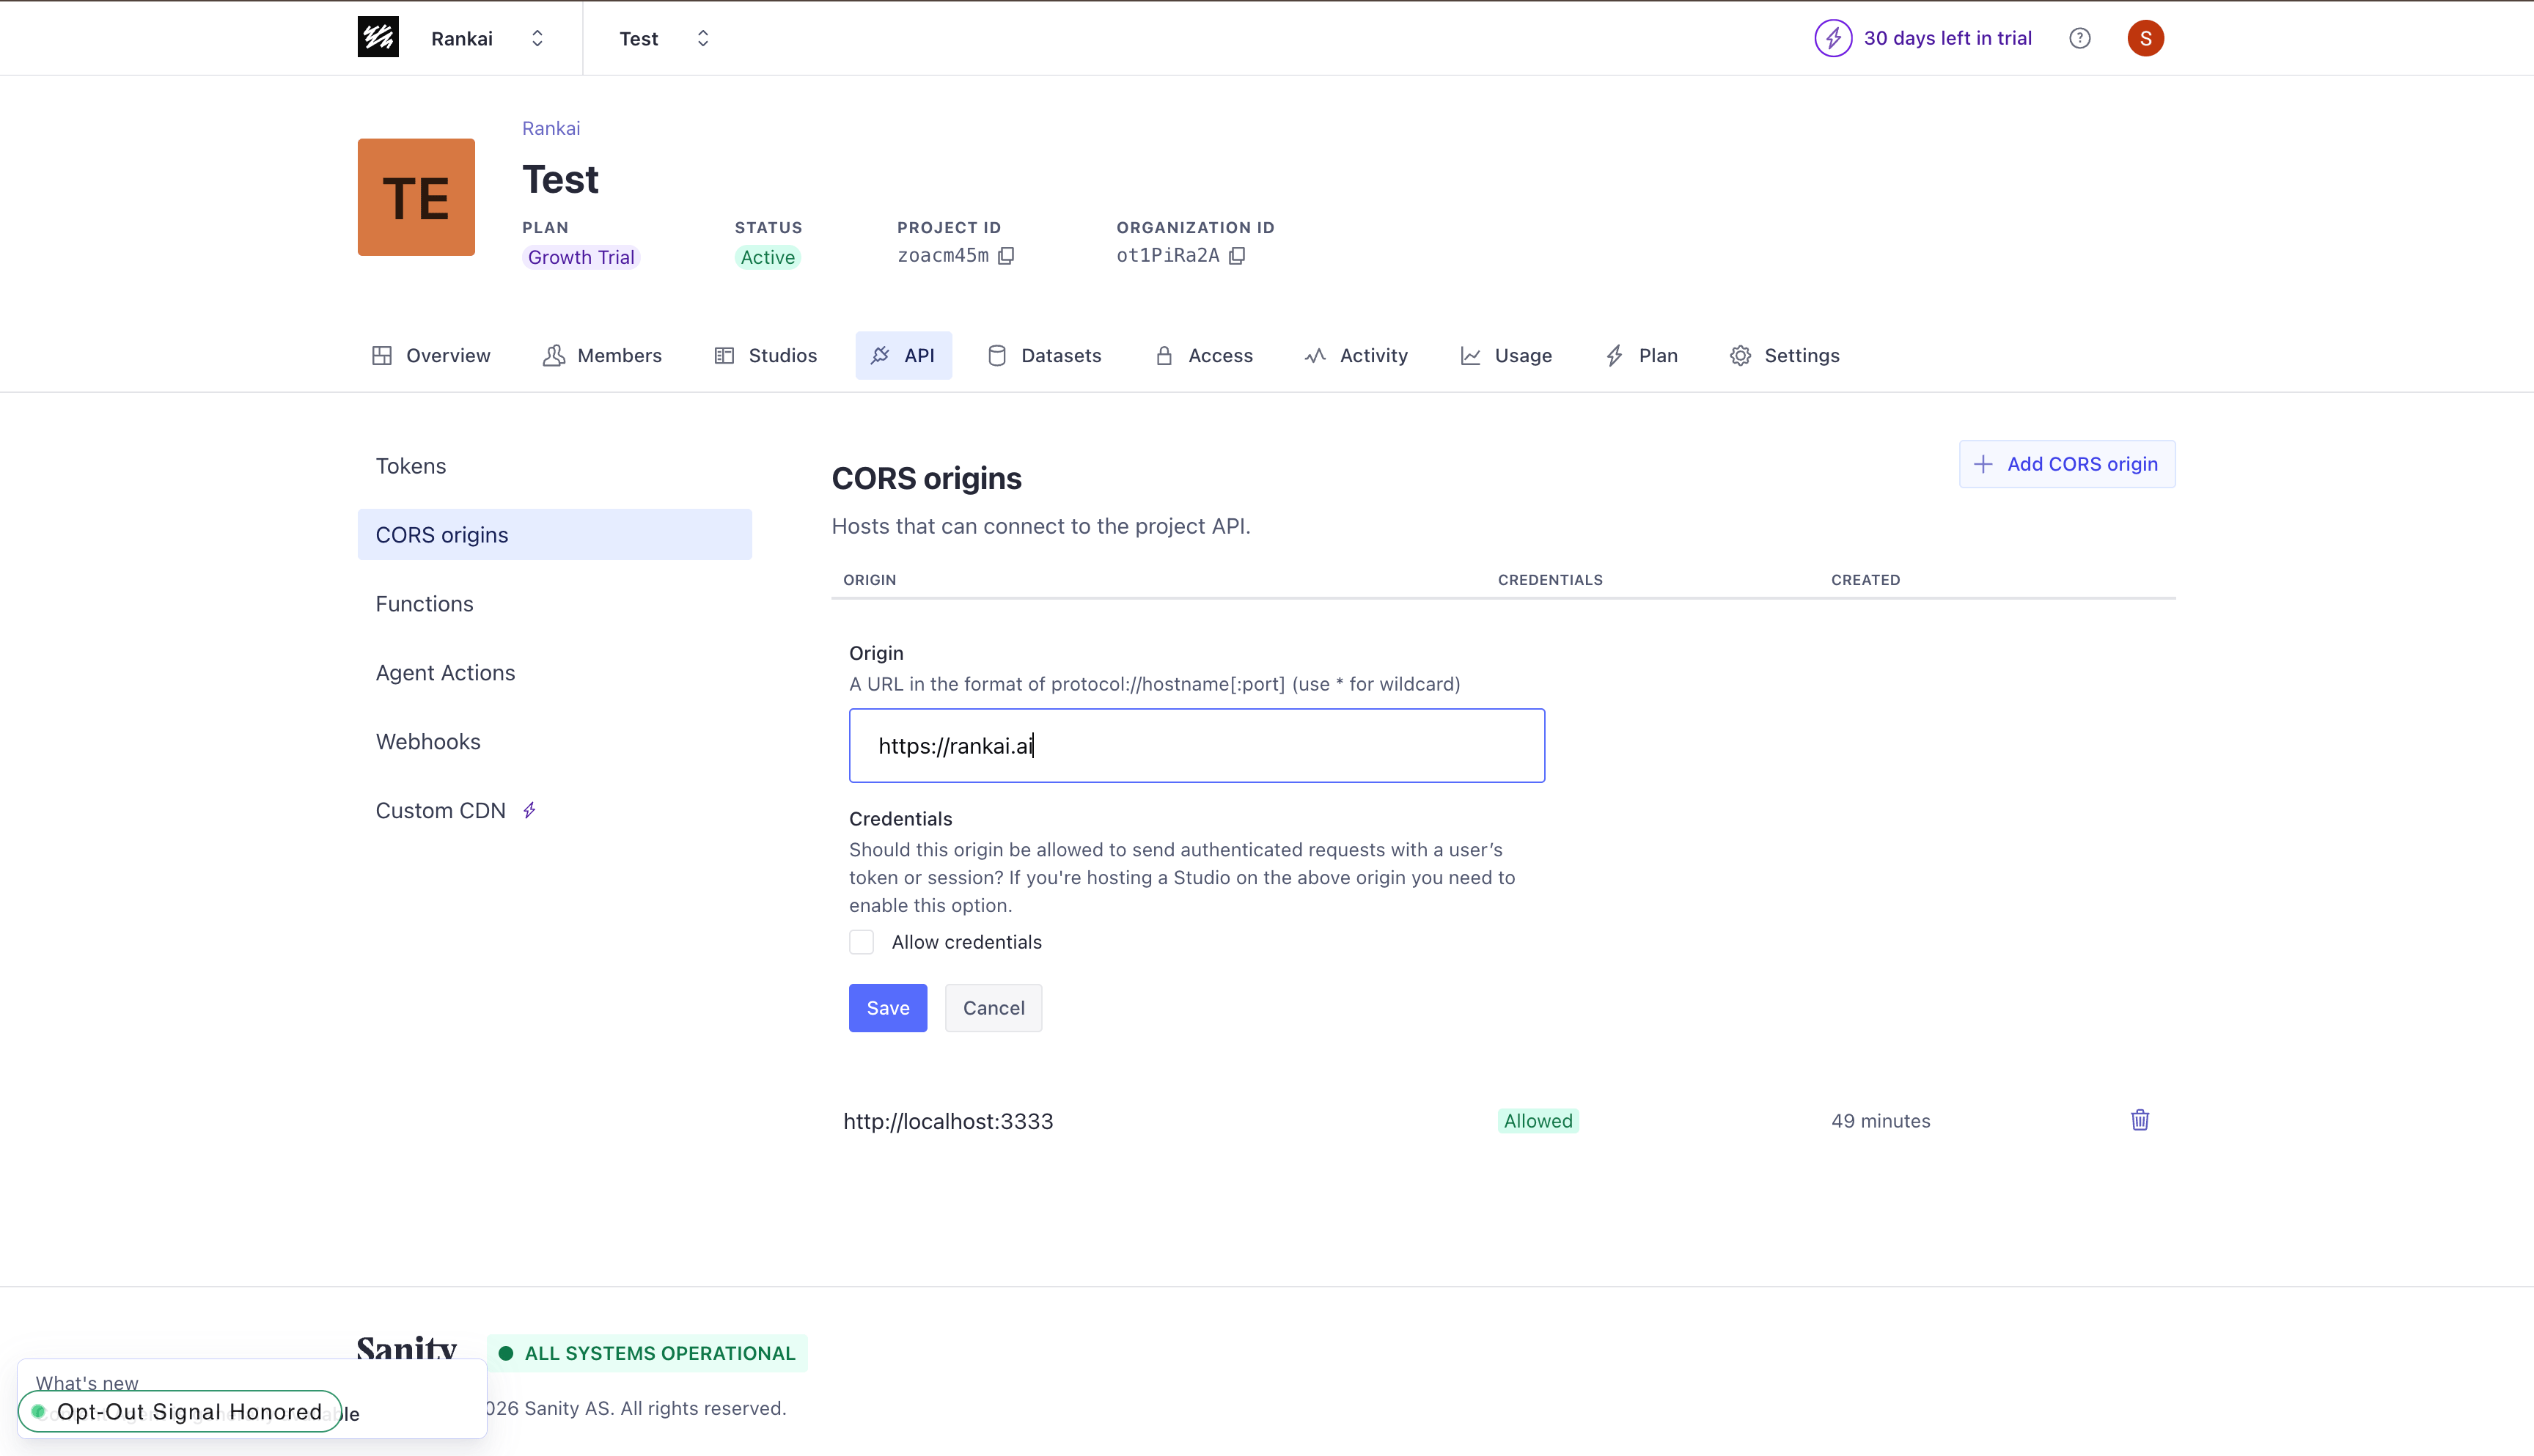 *Enter your RankAI app URL and save the CORS origin.*
* Paste the token into the **Sanity API Access Token** field in RankAI, then click **Connect**.
*Enter your RankAI app URL and save the CORS origin.*
* Paste the token into the **Sanity API Access Token** field in RankAI, then click **Connect**.
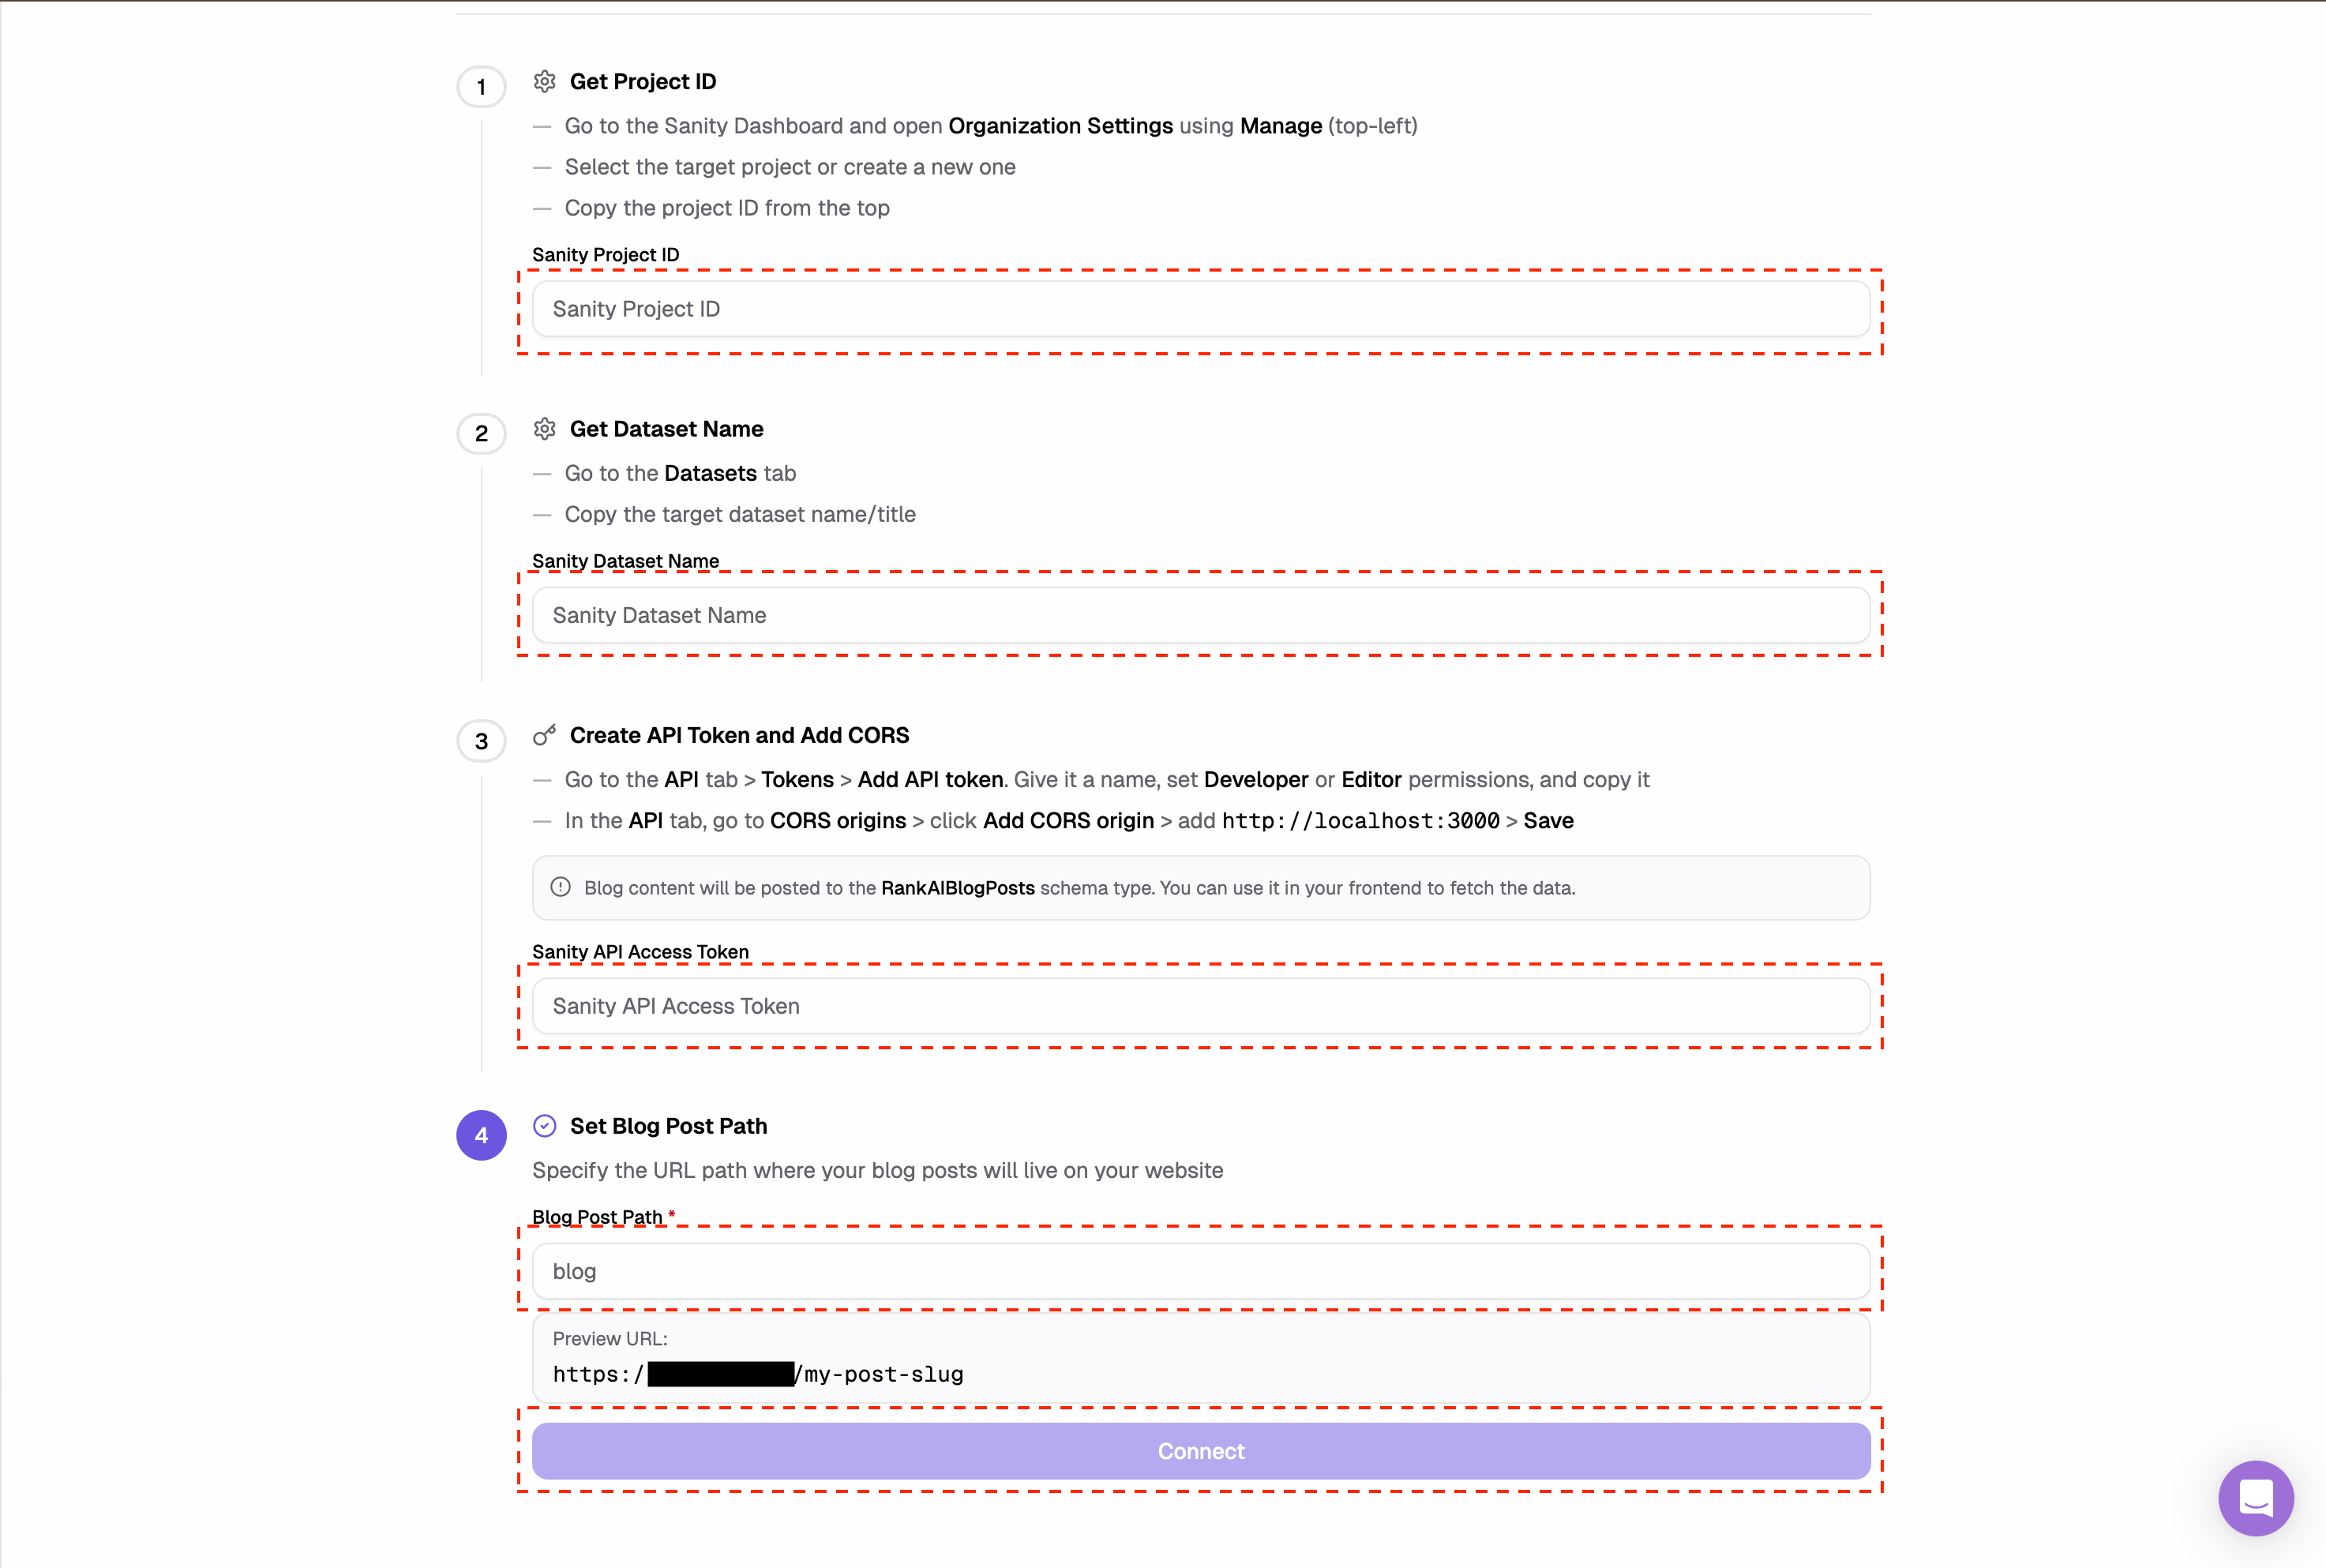 *Enter your Sanity project ID, dataset name, and API token in RankAI.*
Note
If publishing fails, double-check that the API token has write permissions and that your RankAI app URL is listed in CORS origins.
## Optional: Add the RankAI schema to Sanity Studio
RankAI publishes to a schema type called `RankAIBlogPosts`. If you want to view the content in Sanity Studio, add the schema to your project:
1. Download the schema file at [https://rankai.ai/sanity/rankaiblog.txt](https://rankai.ai/sanity/rankaiblog.txt) (open the link in a new tab to download).
2. Save it as `rankai.ts` (or `rankai.js`) inside your `schemaTypes` folder.
*Enter your Sanity project ID, dataset name, and API token in RankAI.*
Note
If publishing fails, double-check that the API token has write permissions and that your RankAI app URL is listed in CORS origins.
## Optional: Add the RankAI schema to Sanity Studio
RankAI publishes to a schema type called `RankAIBlogPosts`. If you want to view the content in Sanity Studio, add the schema to your project:
1. Download the schema file at [https://rankai.ai/sanity/rankaiblog.txt](https://rankai.ai/sanity/rankaiblog.txt) (open the link in a new tab to download).
2. Save it as `rankai.ts` (or `rankai.js`) inside your `schemaTypes` folder.
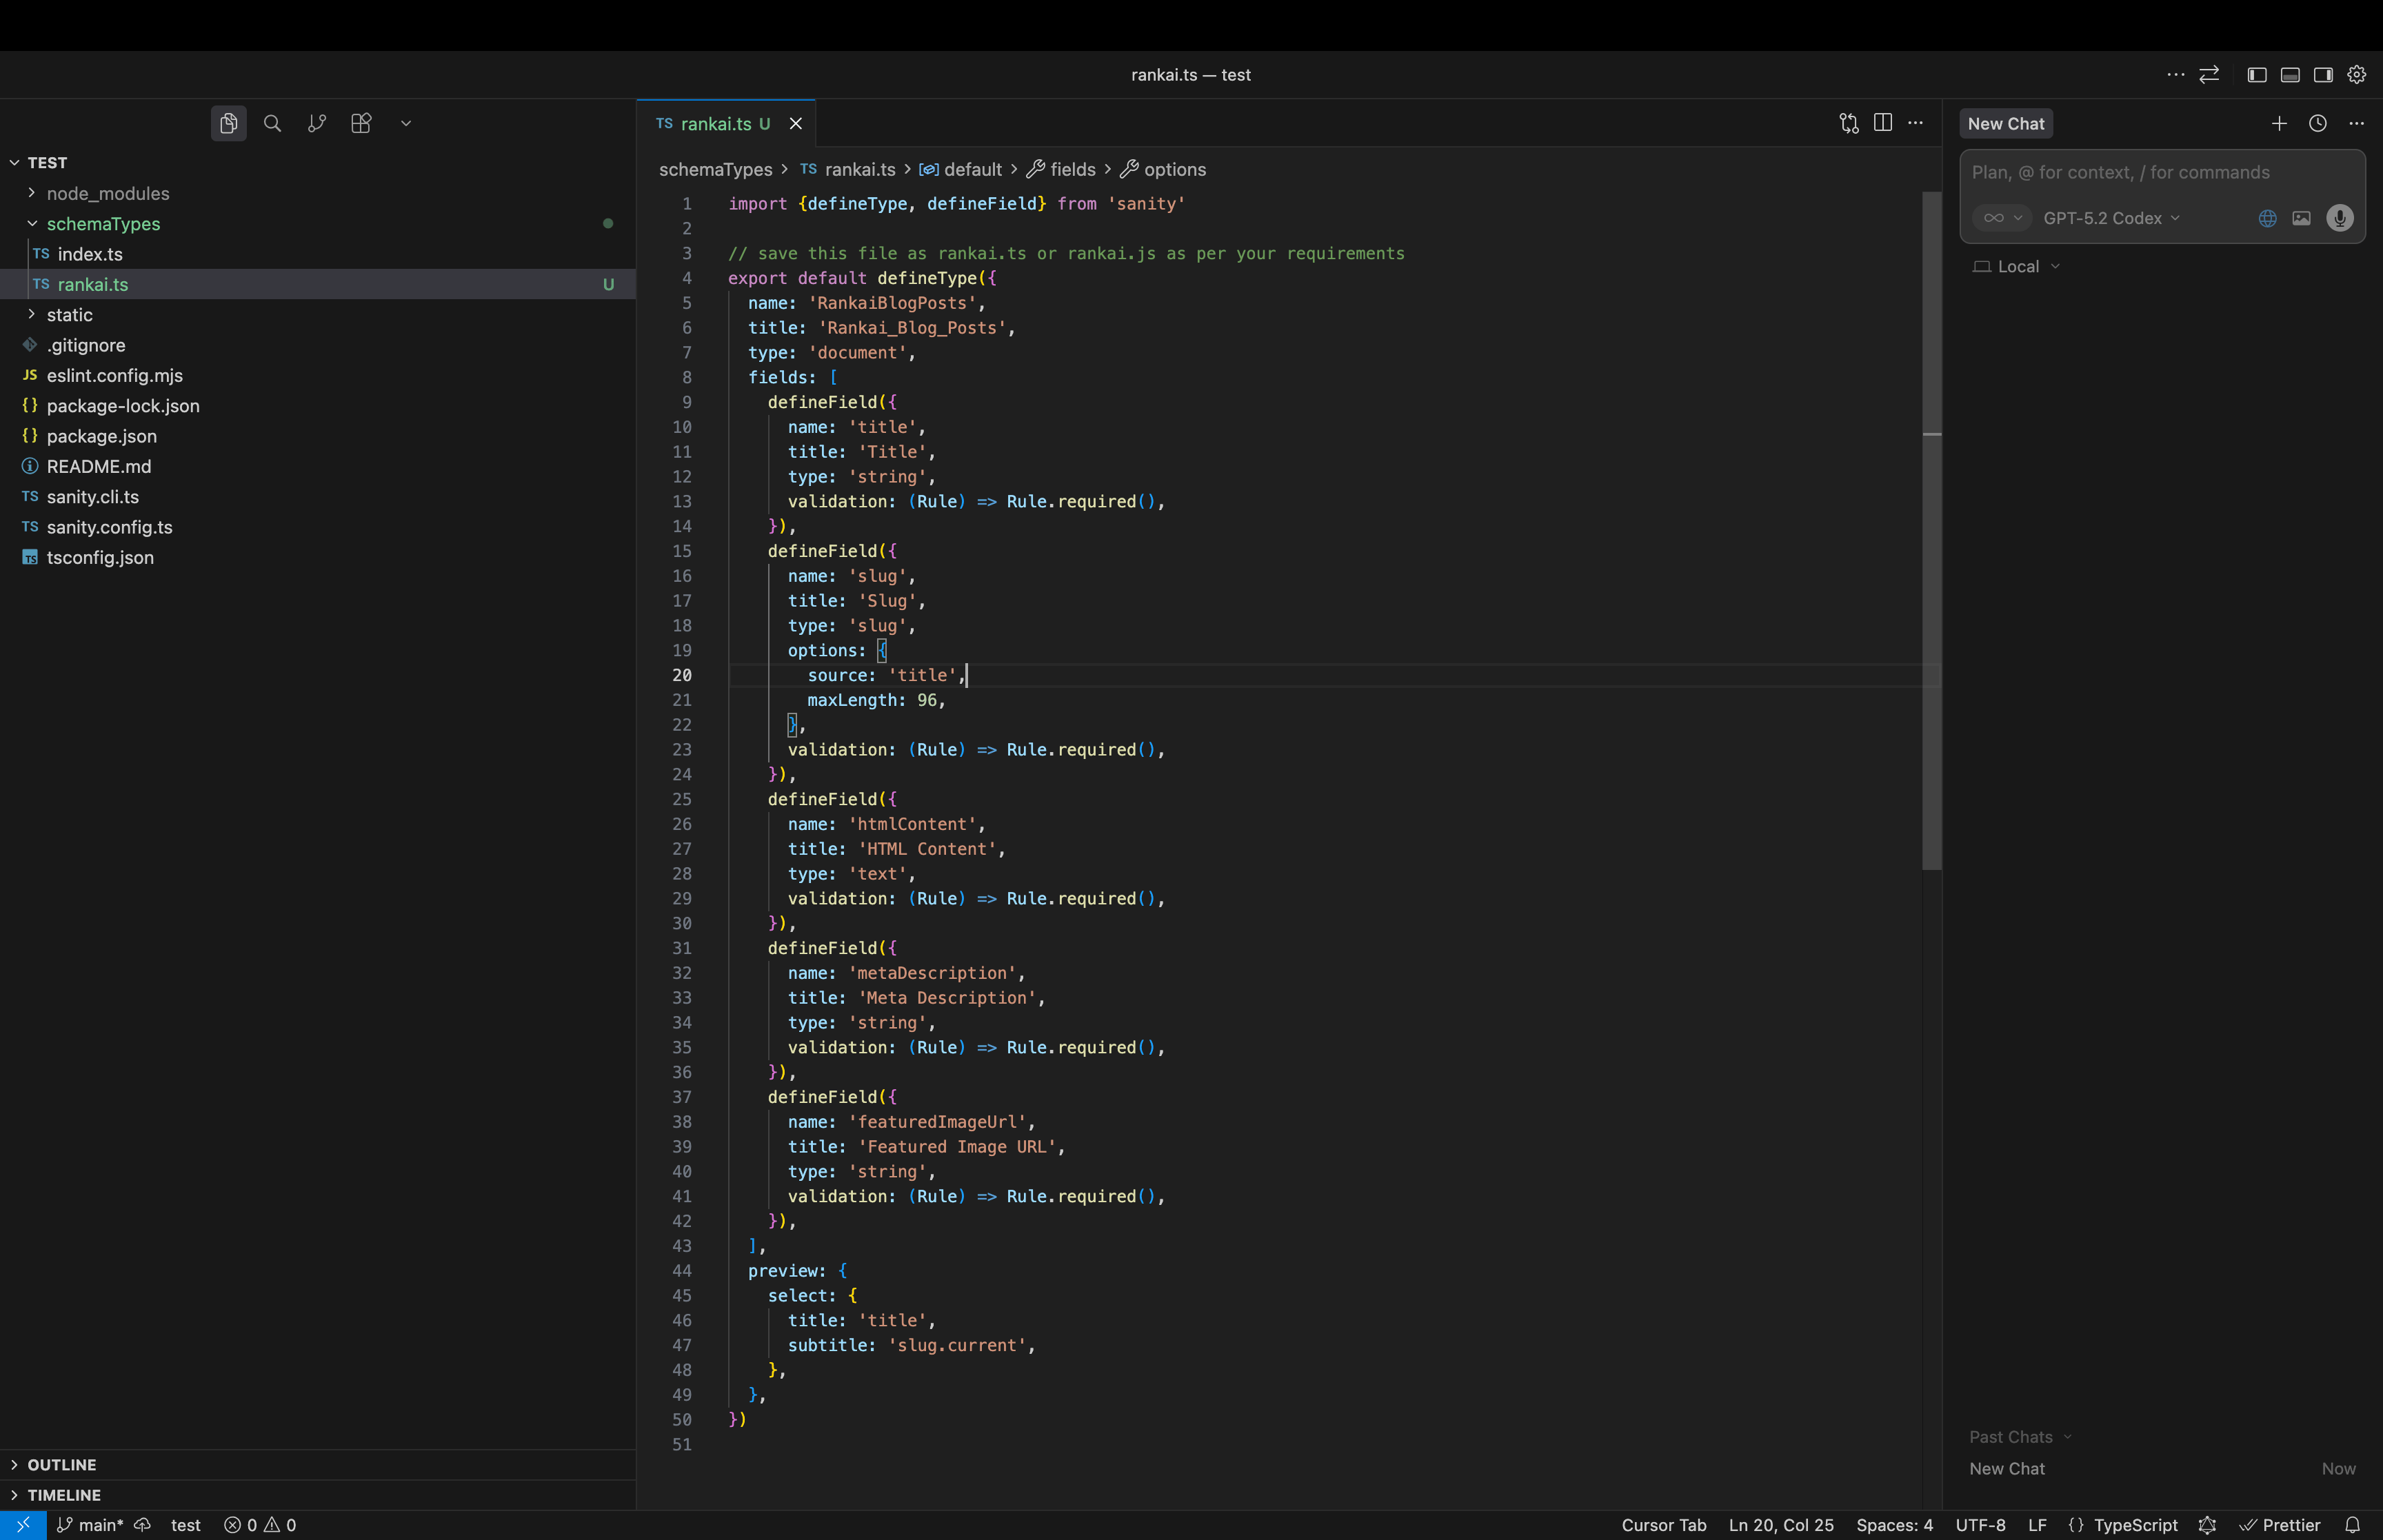 *Save the RankAI schema file inside your schemaTypes folder.*
3\. Update your `schemaTypes/index.ts` to include the RankAI schema.
*Save the RankAI schema file inside your schemaTypes folder.*
3\. Update your `schemaTypes/index.ts` to include the RankAI schema.
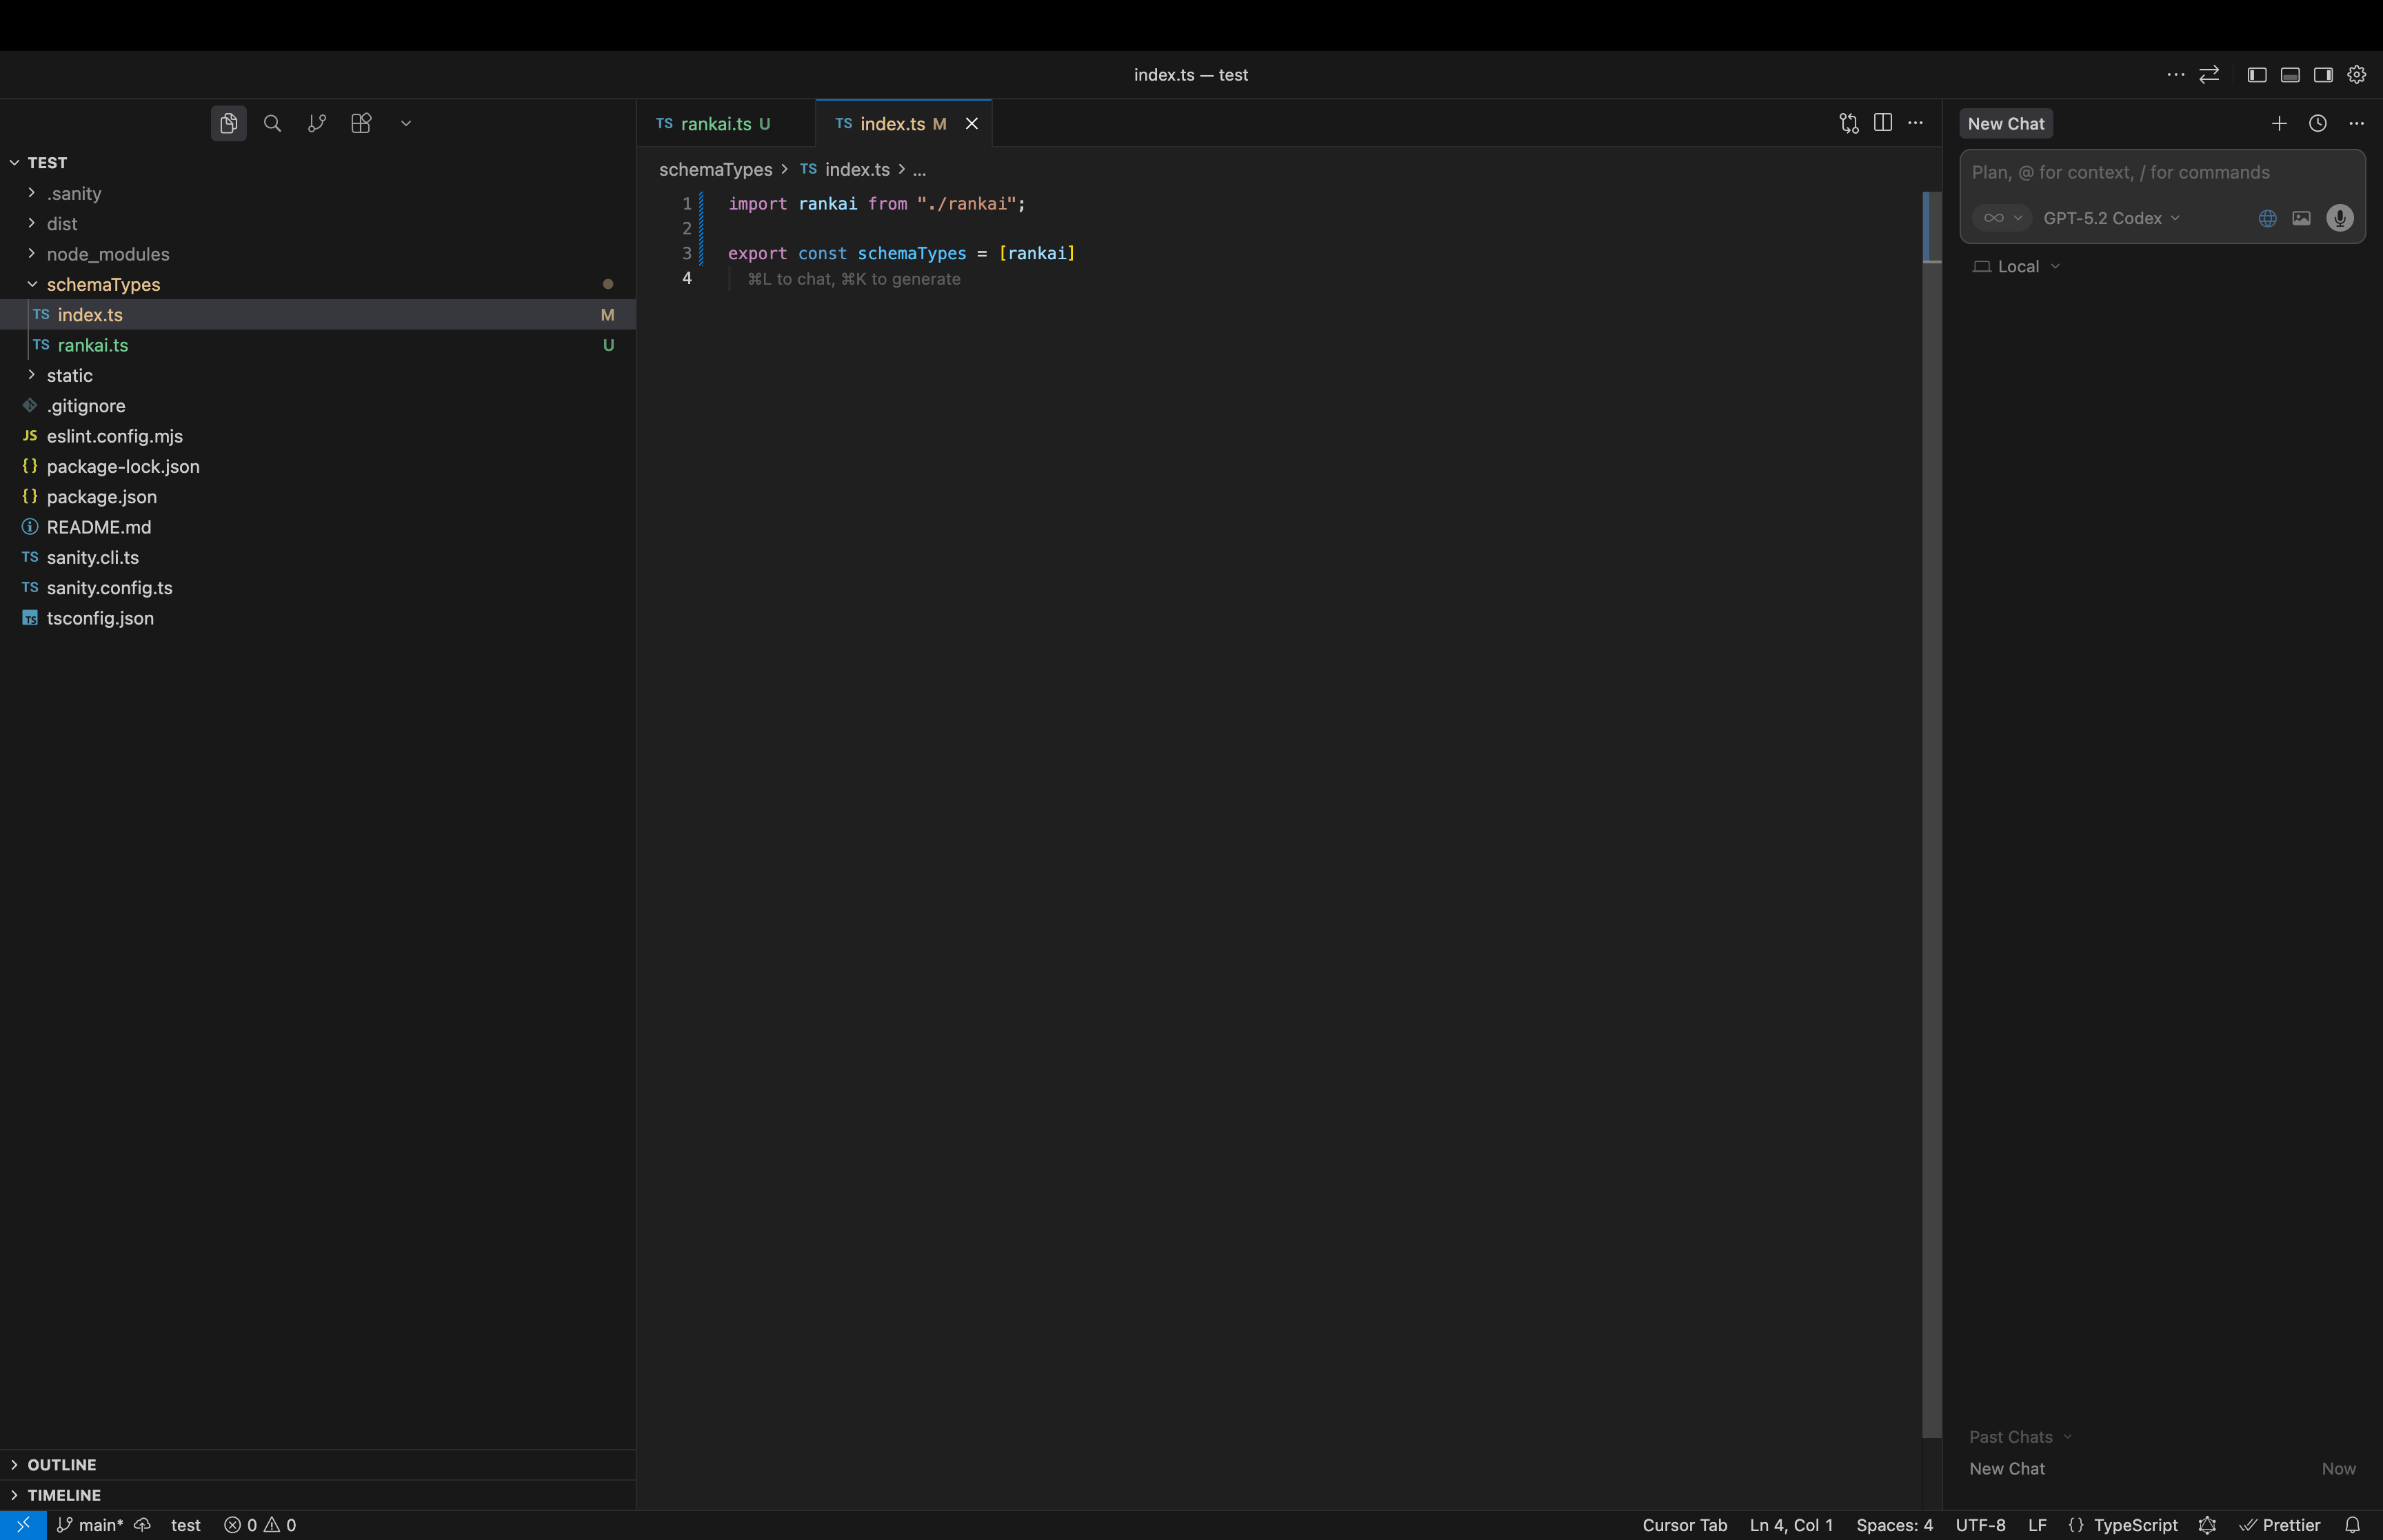 *Import the RankAI schema in your schemaTypes index file.*
4\. Deploy your schema changes (for example, `npx sanity deploy`).
*Import the RankAI schema in your schemaTypes index file.*
4\. Deploy your schema changes (for example, `npx sanity deploy`).
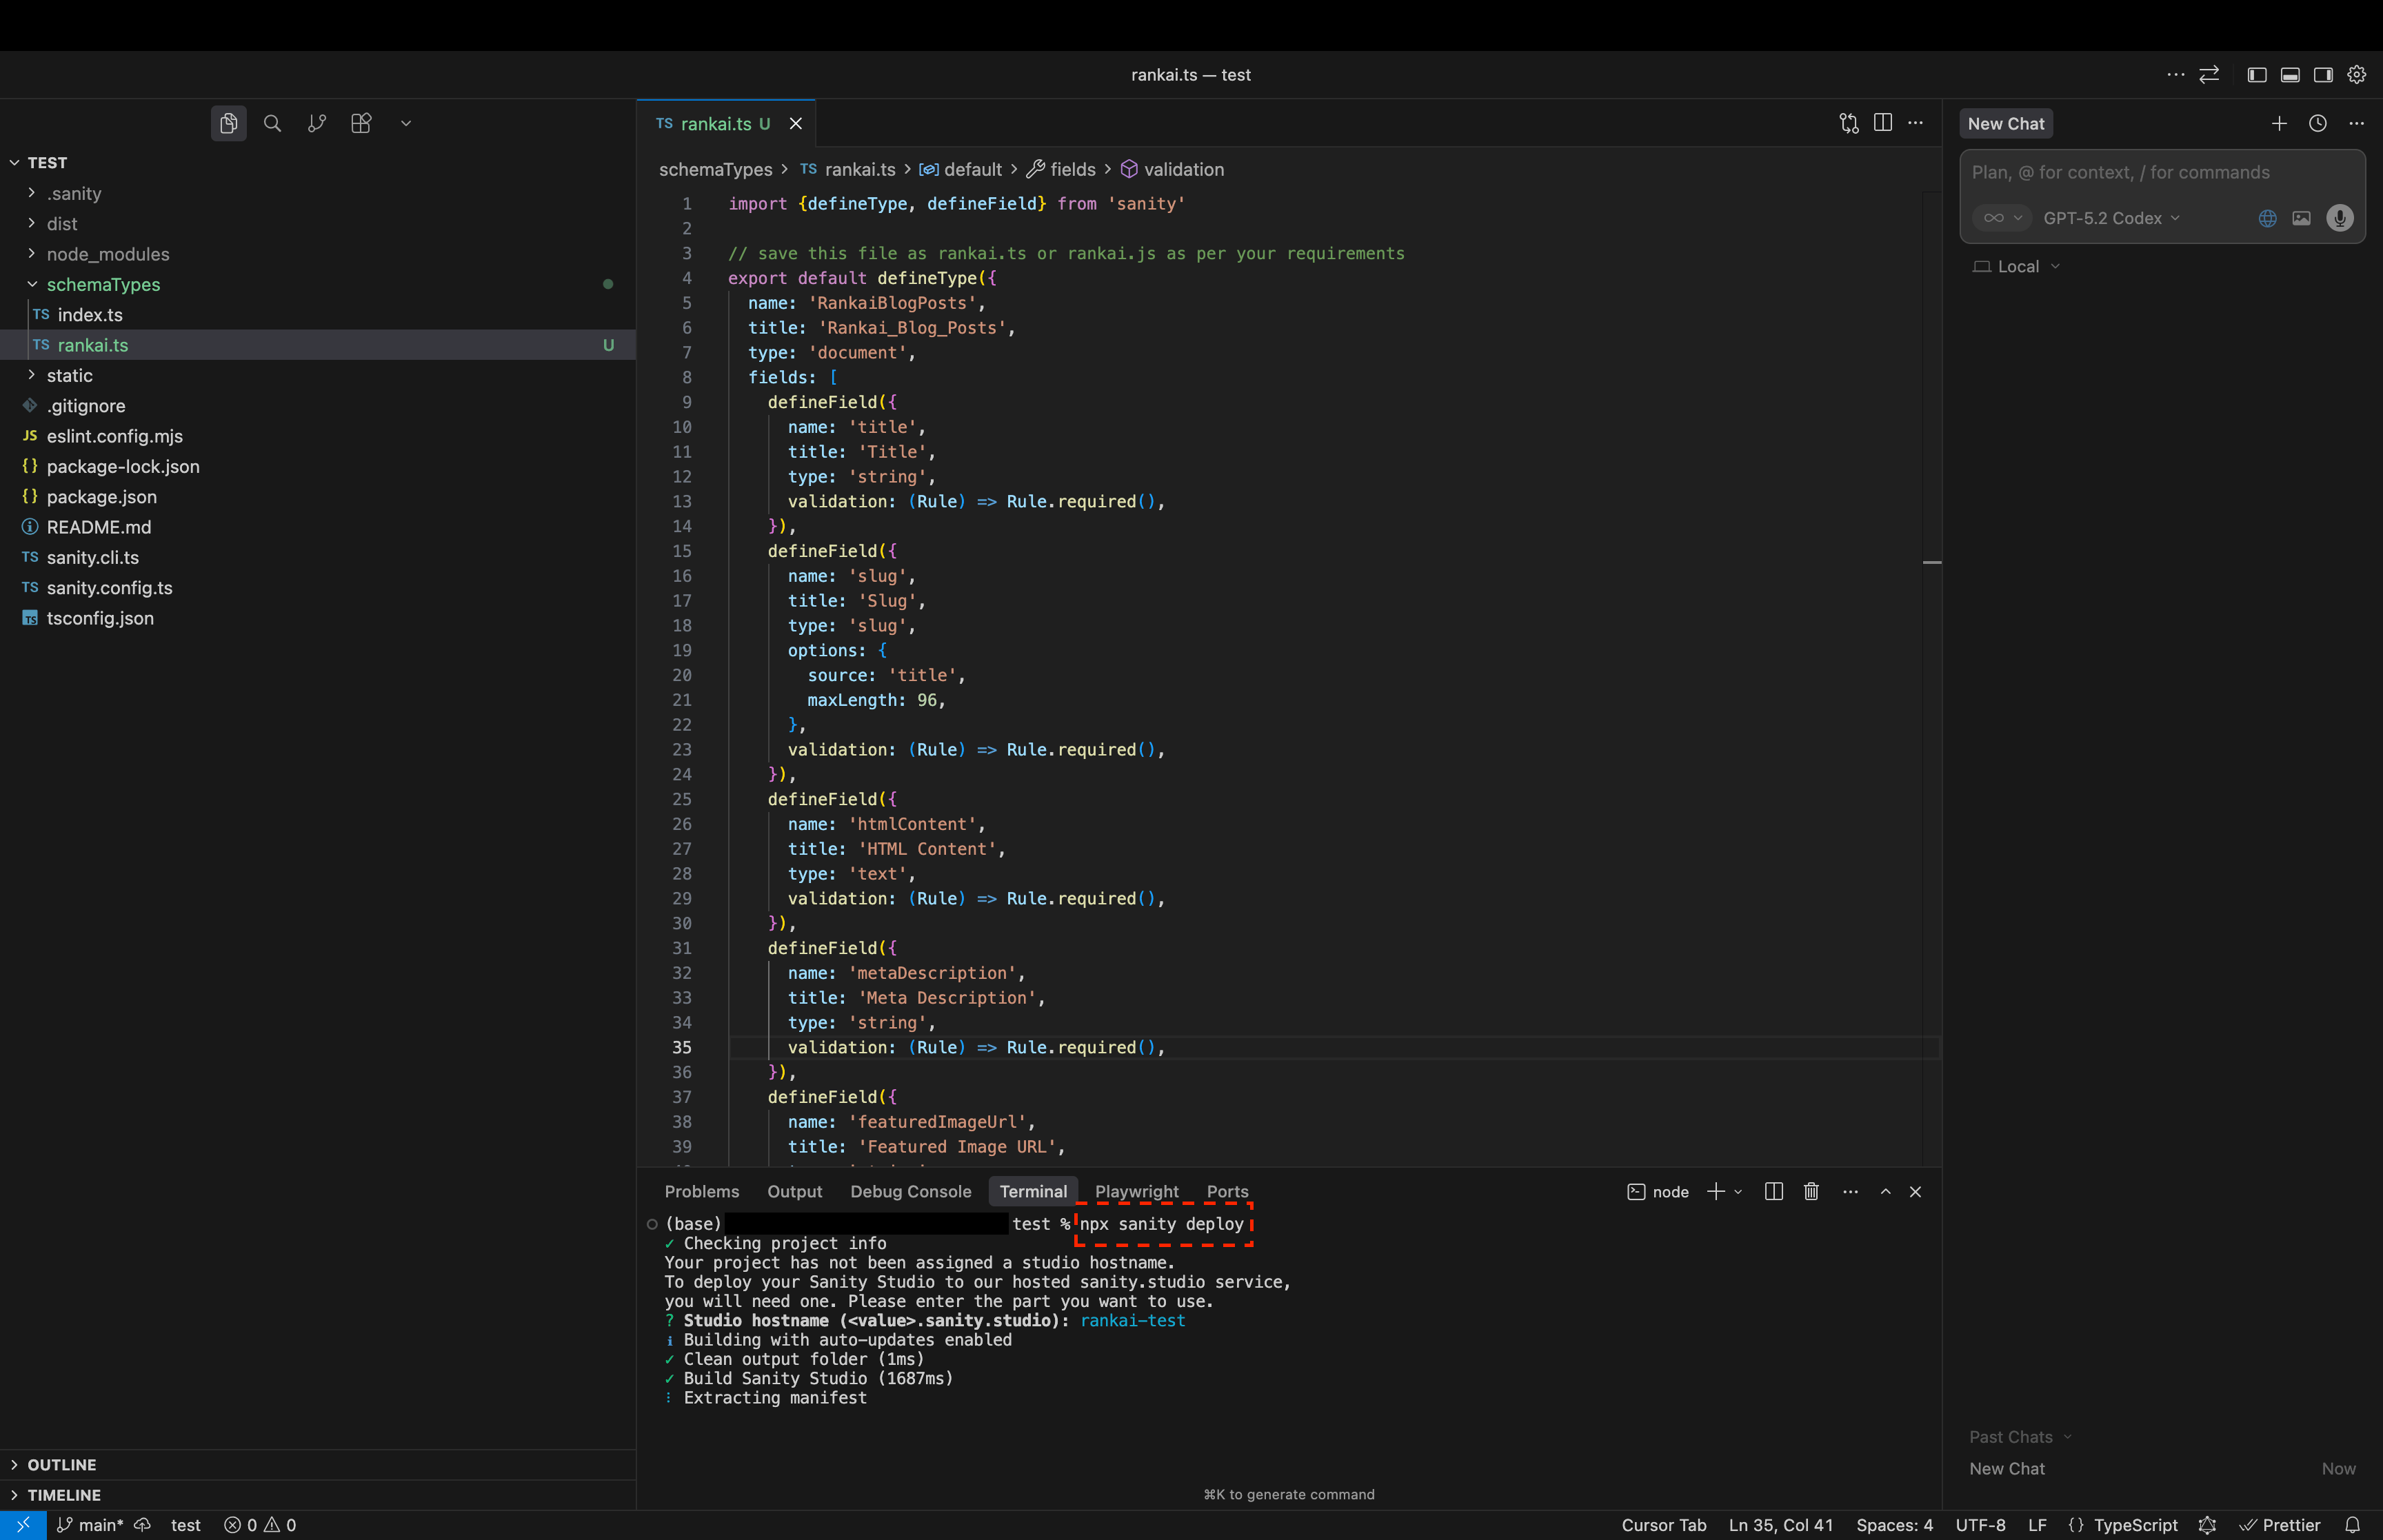 *Deploy your updated schema to Sanity Studio.*
5\. Confirm the RankAI schema appears in Sanity Studio.
*Deploy your updated schema to Sanity Studio.*
5\. Confirm the RankAI schema appears in Sanity Studio.
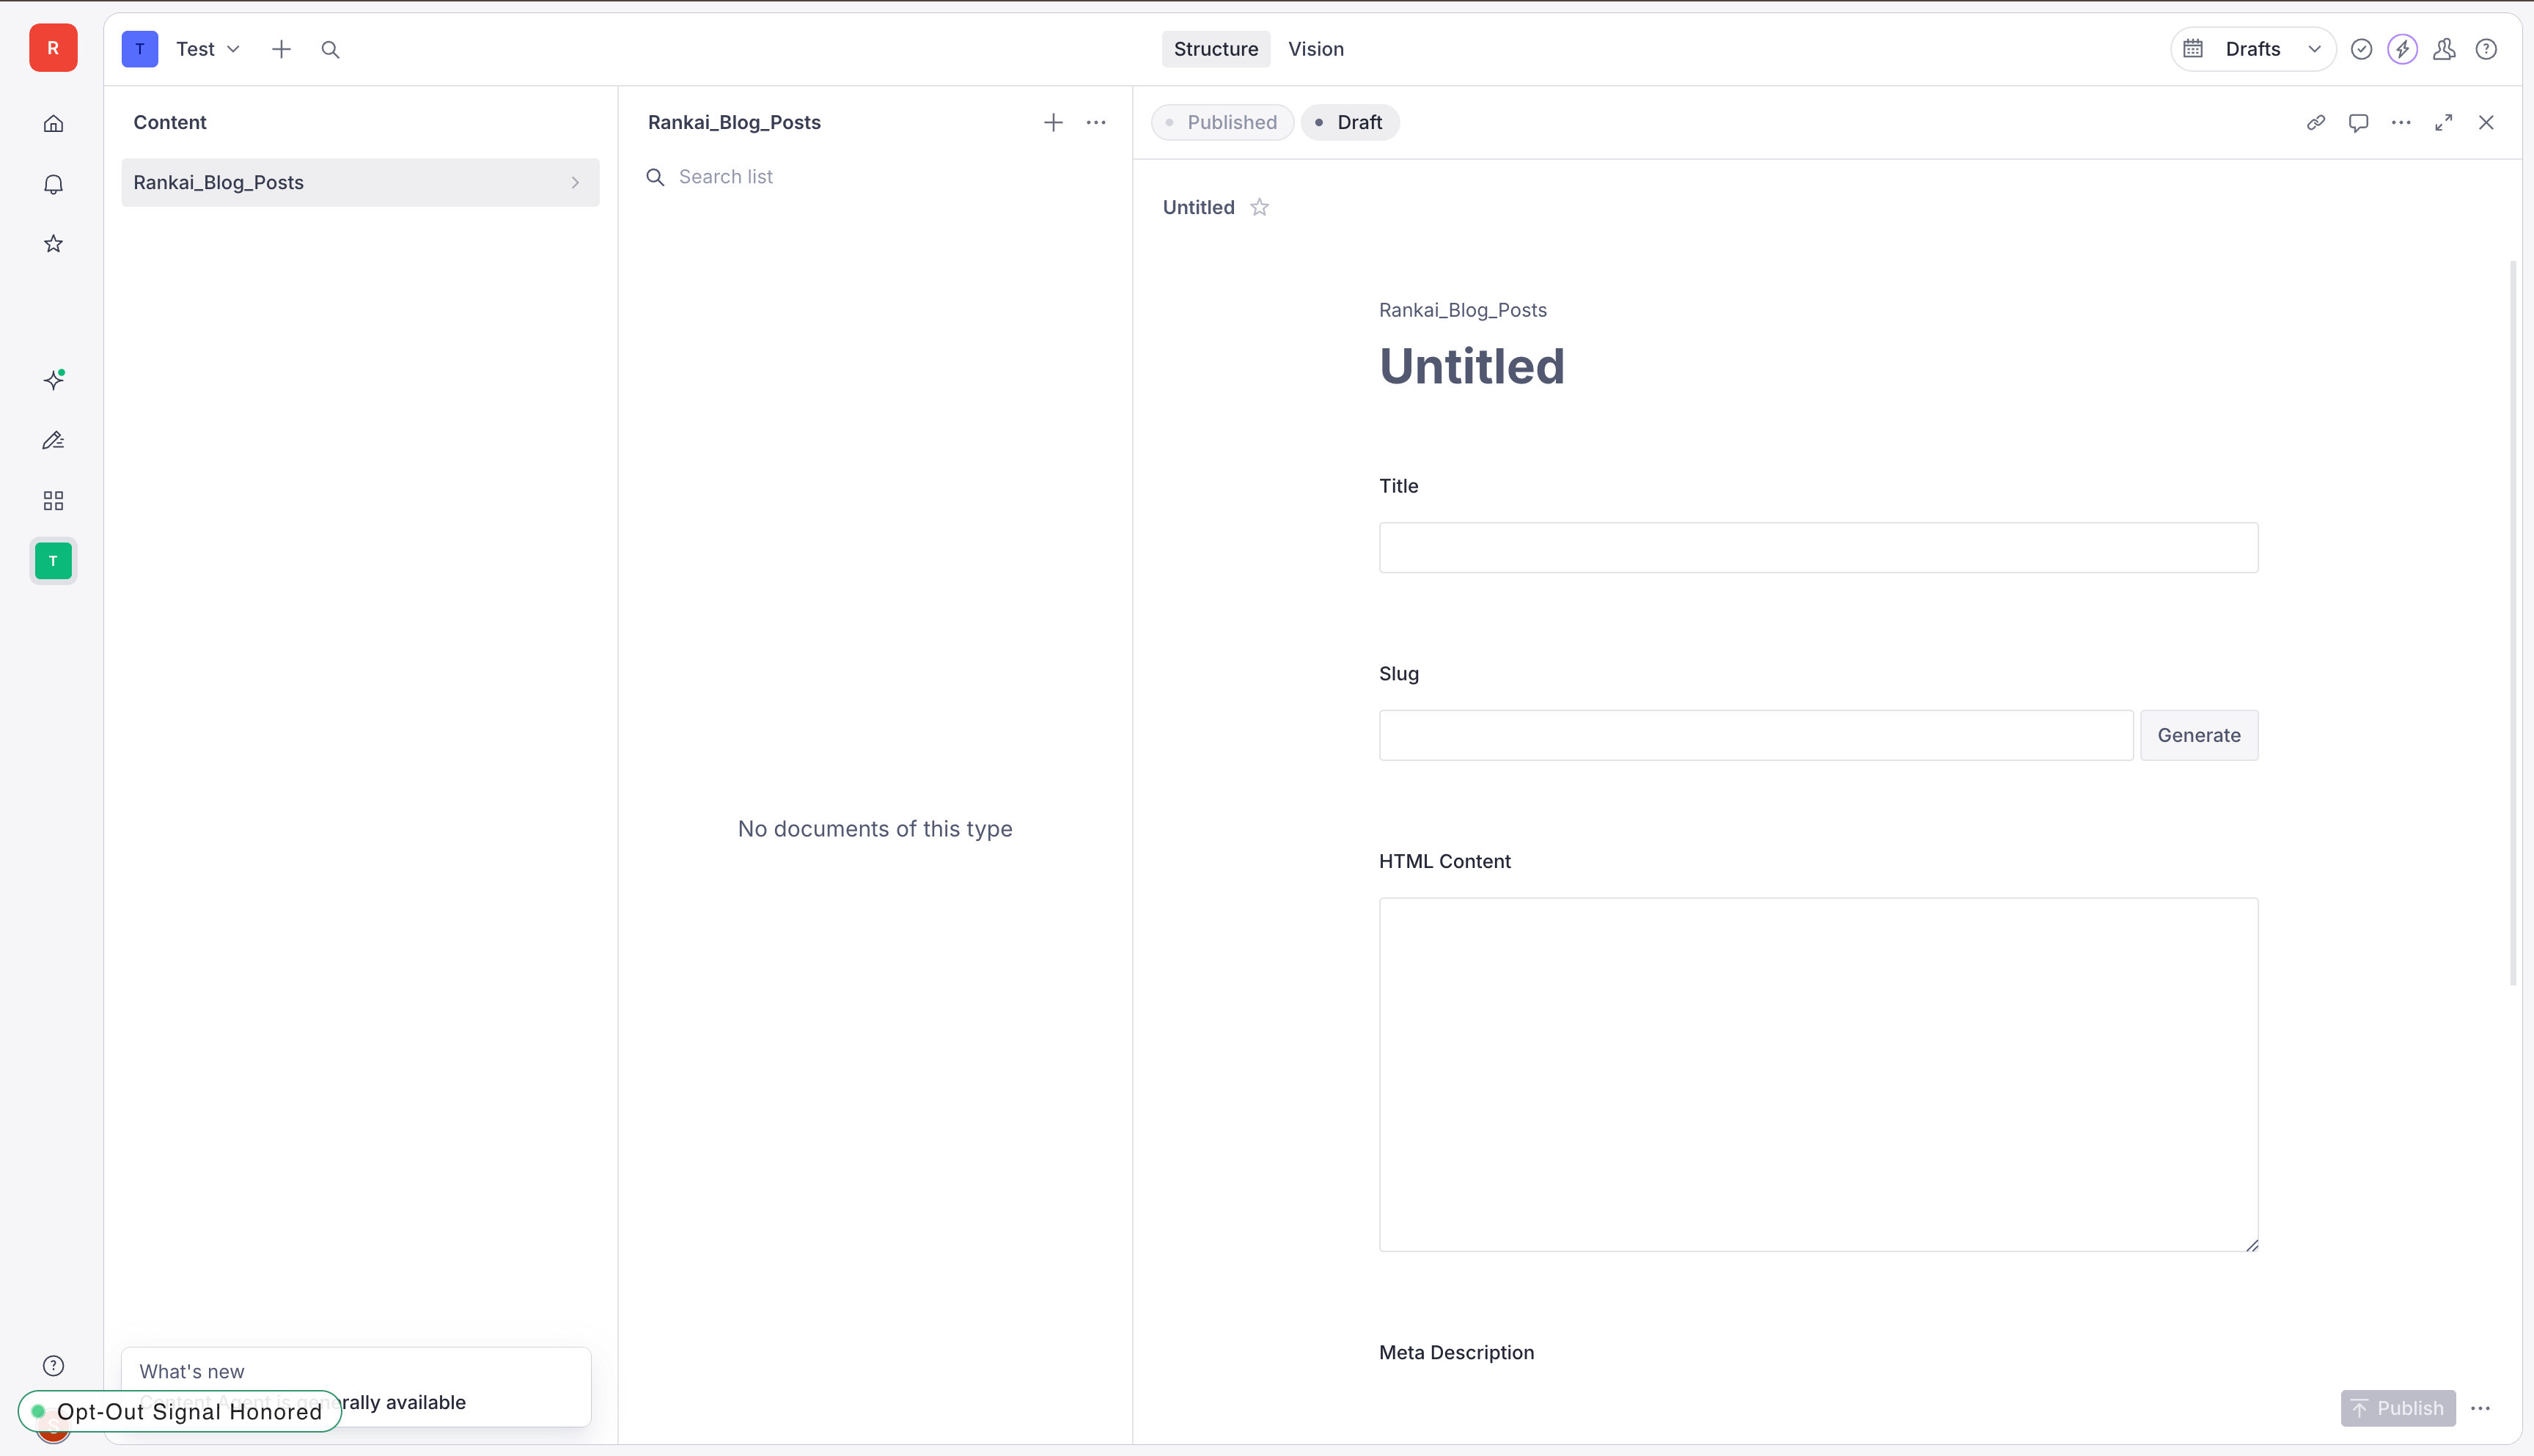 *RankAI schema is now available in Sanity Studio.*
## FAQ
### Which permissions should the API token have?
Use a token with **Developer** or **Editor** permissions so RankAI can create and publish documents.
### What schema does RankAI publish to?
RankAI publishes to `RankAIBlogPosts`. You can add the schema to Sanity Studio to view and manage content there.
### Where can I get more support?
Contact your RankAI account team or check the help section in your dashboard.
## Install the technical SEO & AEO script
The CMS connection above handles articles. Follow the separate [illustrated technical SEO & AEO setup](/integrations/technical-seo/sanity) to install the RankAI script.
***
*Last reviewed: October 12, 2026.*
This documentation is built and hosted on [Mintlify](https://mintlify.com), a developer documentation platform.
*RankAI schema is now available in Sanity Studio.*
## FAQ
### Which permissions should the API token have?
Use a token with **Developer** or **Editor** permissions so RankAI can create and publish documents.
### What schema does RankAI publish to?
RankAI publishes to `RankAIBlogPosts`. You can add the schema to Sanity Studio to view and manage content there.
### Where can I get more support?
Contact your RankAI account team or check the help section in your dashboard.
## Install the technical SEO & AEO script
The CMS connection above handles articles. Follow the separate [illustrated technical SEO & AEO setup](/integrations/technical-seo/sanity) to install the RankAI script.
***
*Last reviewed: October 12, 2026.*
This documentation is built and hosted on [Mintlify](https://mintlify.com), a developer documentation platform.